Do you have an old washing machine that is not subject to repair? Do not rush to get rid of it, from this article you will learn how to make eatter from the washing machine engine.
Homemade sharpened from the motor will always come in handy in the household and for homework. Moreover, in stores, industrial essays are expensive, while the grinding machine from the washing machine will cost free.
What do you need emery
The emery machine is useful for such works:
- Restoring cutting quality drills. In order not to buy new drills, you need to know how to sharpen old. During the operation, the drill drill is heated greatly, which is why it is constantly stupid. Talking it on the machine, you can use it many more.
- Sharpening knives, scissors, shovel and other tools. Thanks to a homemade machine from a washing engine, your knives will always be sharpened, and the scissors will be perfectly cut. For this you do not need to apply special efforts.
- If you replace the emery circle to polishing, you can easily process products and parts.
Using the motor from the washing, you can make a sharpening machine with your own hands. To do this, you will have to buy only one detail - the emery circle. All other components are in the motor.

Which engine is suitable in order to make emery
Think on which engine can I use? You can apply any motor from the washing machine, even the brands "Vyatka", "Riga" or "Volga". The main thing is that it possesses sufficient power.
For normal operation of the grinder, there is enough power of 100-200 W, from 1000-1500 revolutions per minute. For highly large parts, the motor with a capacity of 400 watts is suitable. But if the engine speed reaches 3000 revolutions per minute, it must be adjusted or installed a very durable disk.

What you need to create an emery from the washing machine
For the manufacture of a simple grinding machine, you will need:
- engine from washing;
- flange;
- sleeve;
- nozzle on the electric motor (emery circle);
- casing for protection;
- support;
- starting device.
When buying, it is better to choose a product with two circles: a clean and rough version.
You also need to make an adapter with a flange. Since the shaft size does not coincide with the hole of the grinding stone, it is necessary to make an adapter. You can perform it on the lathe, pre-determining the dimensions and by following the drawing. The diagram needs to mention the diameter of the shaft and the opening of the emery.

The flange on the shaft can be made independently. A piece of pipe with a diameter of 32 mm is suitable, not more than 200 mm in length. It must be perfectly sitting on the engine shaft. On one side of the flange, a thread is performed, the direction of which depends on the direction of movement of the shaft. When sending to the engine, the other end of the flange is heated and pressed.
After installation, be sure to lock the flange. You can do it with welding or bolt, drilled flange with shaft.
Adapter from the shaft is ready. It remains to install an element for sharpening the incisors.
Stages of creating a sandpaper from the engine of the washing machine with their own hands
For homemade fixture, an engine with belt drive is useful.
It remains to collect the device correctly. After installing the flange, put on the shaft of the nut with a washer, then a large outline circle and again the nut with the washer.
Motor connection
How to connect the engine from the washing machine machine:
- Applying a multimeter tester, find the tacogenerator wires that show the resistance of 70 ohms (usually they white color). We will not use them.
- There are four wires. Using the multimeter, you need to define pair wires.
- Connect the wires leading to the stator and to the electrolates. The remaining wires must be connected to a wire and fork at the end, then connect to the network.
- Connection locations need to be isolated.

Immediately after connecting the motor for the home emery will start working, and you can evaluate the functionality of the instrument.
Connecting the electric motor of Soviet production electric motor differs from the previous version.
- Here you will find only 4 wires. You need to find pairs.
- Take the multimeter, measure the readings of each of the wires. You need paired wires with less resistance that go to the working winding.
- These wires connect with a fork and connect to the network.
- Now you need to make a starting element. You can use any button, for example, from the door lock. One wire moving from the button, connect with a start-up wire (software), and the other with the working (s).

Now the engine is connected. But before starting work, you need to thoroughly fasten the machine to avoid an emergency.
How to put an emery machine and make protection
How to fix the emery machine and put protection on it? You can fasten it to the workbench.
To do this, use the bracket that is in the washing machine. To reduce the vibration during operation, rubber gaskets are put on the angle, which can be made from a piece of hose.

If the installation of the device takes place on a wooden workbench, cover it on top of a metal sheet to avoid fire.
For its own protection during the use of the machine, install the metal arc over the disk. You can also strengthen the protection, attaching a plexiglass with a thickness of 5 mm on the suspensions. Due to the suspension, glass can be raised and lowered. 
Make a grinding machine independently easy. The main thing is to consolidate it and connect it. Also adhere to security rules when working, use safety glasses and special clothing.
In everyday life, there are often situations when you need to sharpen something. Electruding with your own hands is the solution of many household problems with sharpening tools. These may be household items: knives, scissors or construction tools. Most often in this case, there is a need to overtake drills, axes, shovels. It is difficult to work with a blunt tool, the process moves slowly, the forces leaves a lot. In this case, do not do without a special device, since not every tool can be molded manually.
Electricity can be bought in the store, but you have to give an impressive amount for it. And you can collect from the girlfriend, especially since the masters of men periodically fall into the hands of all the necessary materials. Adjust them for a useful case will not be difficult. As a result, it turns out emery, no inferior to the store, but almost free.
Necessary materials and tools

For the manufacture of the device you need a little:
- electric motor;
- capacitor;
- bracket;
- flange or trimming of pipes and tape;
- tap for cutting threads;
- metal thickness of 2-3 mm for the manufacture of protective covers;
- bolts, nuts;
- rubber for lining.
Back to the category
What electric motor will suit
The main element without which it is impossible to collect the device is the engine.
Usually used motors from the old household appliances. For example, from Soviet washing machines "Siberia" or "Volga". They have reversed engines, have sufficient power and rejection. You can install any necessary nozzles on the shaft.

The number of revolutions per minute should not exceed 3000 in industrial conditions, and for domestic use is enough 1000-1500. With too fast rotation, the outline circle can break. For industrial operations use grinding stones of great strength and special flanges. Home master is unlikely to be able to find such materials. A high speed is needed not so much for sharpening as for alignment and polishing the product. Again, for household conditions it is not useful.
Do not chase and for too much power. In the manufacture of the machine with your own hands, the top plank is 400 W. On the average, engines are used from washing machines whose power does not exceed 200 W. To sharpen knives, trim, drills, more than enough. In addition, at such power, it does not have to fear that it will develop too much speed. Consequently, the safety of the disk (and their own health) does not have to worry.
Single-phase and three-phase engines are suitable for the electrical. Both those and others can be connected to a single-phase network. For proper connection, a capacitor may be required. Usually used asynchronous electric motors.
Back to the category
How to pick a flange

At first glance, everything is simple: the engine is taken, emery attracts on the shaft, the device is turned on to the network and begins to sharpen. However, at the stage of installation of a grinding stone, difficulty arises: the diameter sharpened, as a rule, does not coincide with the diameter of the shaft. Yes, and there is no thread there, that is, to fix the emery is not possible. To eliminate this problem, you will need a flange - a special item that is pulled by the size of the shaft and the inner diameter of the abrasive disk.
To pull the flange, you will have to use Tokary services. In the drawing of the electrician, you need to specify the inner diameter of the grinding circle and the size of the shaft. You need to specify which way the axis rotates. Perhaps a special flange is the only part that must be made to order. But it can be replaced with replacement materials.
The finished flange is installed on the shaft and fixes with the nut, washers and bolts. On the nut will have to cut the thread. If the shaft movement goes clockwise, left-sided thread should be used. When rotating counterclockwise - right-sided. Compliance with this rule is strictly mandatory. With such a cutting of the thread, the nut will be gradually tightened, and the circle is increasingly fixed. If you do everything on the contrary, the nut will be gradually promoted. As a result, sharpened can break from the shaft. It is very dangerous, as it is unknown, in which direction the rapidly rotating stone will fly. It can cause severe damage or injury.
Back to the category
Analogue of flange sharpened

However, not everyone has a familiar turner or suitable equipment. In this case, you can make an analogue of the flange. The case will be more complicated, but the result is reliable.
In this case, you have to use the sleeve system. To work, you will need trimming pipes of the required length and suitable diameter. The slots are eliminated using cotton insulating tape. If necessary, the bushings are inserted into each other.
When winding the tape should be very smooth. If there are noticeable bugs, the disk will fight when rotating. The bushings are selected in such a way that the internal diameter coincides and the pipes. The ideal option will be the one in which the stone will sit on the sleeve without a tape very tightly, in a latitude. Winding will provide a more dense connection, the disk will not scroll on the pipe.
The sleeve system is very tight and tight on the shaft, but the fixation with bolts is necessary, since only it can provide an adequate level of reliability and safety.
You can cut the thread yourself, at home. To do this, you will need a tap.
Back to the category
Direction of work

Before making the manufacture of electricians, you need to see, in which direction it will spin. In the device collected from undergraduate materials, you can change the direction of rotation without much trouble. The engines that are most often used are taken from Soviet washing machines. And they are asynchronous. This means that when switching some windings, the direction of movement easily changes. Old motors have several conclusions (3 or 4), which will go on hand when referring direction.
The direction will change if you change the triggerings of the startup. Such a reception can be useful when threaded problems, sprinkling nuts, etc.
You can do without a launcher. Then the work turns directly: the network simply turns on the working winding, sharpened to push in the right direction, and it will start rotating.
To properly determine where the worker, and where the starting winding is needed, the tester will need. The level of resistance is the first about 12 ohms, the second is all 30 ohms.
Back to the category
Protective device casing
When all the basic details are selected, you need to take care of compliance with safety.

It is no secret that when sharpening metal products, sparks fly. In order not to burn yourself, do not get injured, as well as protect the working surface from the swelling, it is necessary to make a protective cover. You can make it from trimming of tin or metal. The optimal thickness of the plate is not less than 2 mm. Iron can be screwed directly over the grinding circle or secure with a clamp. The shield will also reduce the amount of dust.
Additional safety during operation will provide a hinged canopy from plexiglas, which is attached to the casing and is reclining if necessary.
The girlfriend does not hurt. When working, it is much more convenient to rest in it than all the time to keep the part on the weight.
Back to the category
Installation of the device
When the power was collected, you can start it. It is necessary to fix sharpened very hard and reliably, since there are large vibrations when working.
Install the engine on the working surface can be using the same bracket that holds the motor in the washing machine. This will require bolts. The opposite side of the engine will rely on the angle. Thanks to this mount, the motor will be in a horizontal position. An angle can be installed rubber lining: it will reduce vibration.
You can use other installation methods. For example, fasten the device on the stand, then it will be more mobile, as it will not be screwed to one place.
All, the machine is ready to work. You can housing various parts, tools, drills, etc.
Any hostess dreams of sharp knives. In the kitchen without such cutting tools it is difficult to do. Not everyone succeeds in the right sharpening: it seems and tried, and the knife still does not cut or quickly stupid. Often the reason for this is incorrectly produced sharpening. From such a situation, you can exit if you use the machine for sharpening knives.
Modification of Tchochelle
In stores selling a large number of all sorts of devices and machines, ranging from the simplest and ending with automata. However, many of them either do not bring sharpening to the ultimate goal, or are too expensive. All machines can be divided into three categories:
- superhard;
- solid;
- soft.
For sharpening the tool should be manually driven by abrasive, seeking the desired effect. Many use this way, but not everyone will turn out. The reason is that it is necessary to strictly observe the sharpening angle. It depends on the hardness and volume of the material being cut.
For the tools below it is necessary to withstand the following angles in degrees:
- razors - 8-12;
- blades for cutting fillet - 10-15;
- kitchen knives - 15-20;
- hunting tools - 20-25;
- heavy knives (for example, machete) - 30-50.
 Next, to which you need to pay attention to the nutrition of the knives is the size of the grain of the abrasive material. To sharpen the highly blocked knives, abrasives with larger grain are used. It will help to quickly remove the extra metal. When aligning the surface, medium emery stones use, and for grinding you need a very fine grain. Usually on the emery circles and bars, abrasive size is indicated in numbers:
- 300-350 - very large, used for trimming;
- 400-500 - average, allows to produce a major sharpening;
- 600-700 - fine, it can be aligned with the blade;
- 1000-1200 - very small, with it is possible to polish the tool.
To sharpen the knife manually, on the table or workbench lay the bar or the emery circle and secure it. The cutting tool holds the blade on the abrasive from themselves, exhibit it to the desired angle. At first, use the transporter. Subsequently, when a certain experience appears, it will be possible to do without it.
Begin to sharpen the blade, strictly by following the observance of the angle. Such work requires attention and experience, so it can not immediately work out. It will be much more convenient to perform it if you make your own knife sharpening device. With your own hands, the collected product will cost much cheaper.
Use of machine tools
Most. simple devicewhich can be done at home is a wooden corner. A bar will be invested in it. The base is manufactured in the form of a box, the size of which is selected by abrasive. The second side of the angle is of the same shape and attached in a vertical position. So that the device was more stable, the base is connected to a wide board.
 The device is embedded vertically bar. In this position, the angle is 0 °. To create the desired inclination, the lower edge of the abrasive is beginning to be removed from the vertical, the angle is measured by the transporter. So that the bar did not "traveled", stopped down at the bottom (you can simply screw the screw). For sharpening, the blade is driven by the emery strictly in the vertical plane. With fine processing and grinding, the bars change. Since the stone is becoming unevenly, they constantly need to be aligned with more solid bars. The use of emery paper eliminates such hassle.
To do this, take a sandpaper with a large, medium and small grain, as well as a leather belt. A bar is cut from the tree in the size of the abrasive and processed by sandpaper. One billet is made from a leather belt. Each face of Bruke is numbered, and the numbers are set near the upper and lower edges. To the plane at number 1, a ribbon with a large grain is glued, 2 - with an average, 3 - with small, 4 - leather from the belt.
Ribbons are attached with an indent from the edge. Thanks to this, the numbers will be visible, and the bar will enter the grooves of the box. The blade begins to sharpen 1 or 2 and then go to the next edges. As sandpaper abridges, it is cut off with a knife and glue a new one. Compared to BROs, paper costs much cheaper.

Such a device can be modified. The vertical rack is attached to the base through the hinge so that it can lean back, increasing the sharpening angle. On the other side where the rack bends, the stop is made, for example, two plates bonded between themselves through the longitudinal slots with a bolt or nut. In this case, the lower edge of the bar will be fixed.
Comfortable designs
Although the design described above have a number of benefits, but they have one significant drawback - it is necessary to constantly monitor the vertical blades, and this is tiring. It is much easier to work with an electric machine for processing kitchen tools.
Emery, so called the device for sharpening knives, it makes it much easier for the task. The blade is tied to a circle in such a way that it is directed against its rotation. But in this case, it is necessary to monitor the angle of sharpening.
 To make it easier to work, you can make a wooden stand. It consists of two parts: base and actual corner. The support helps to raise the knife to the desired height, the other workpiece with the inclined platform is placed on it, it will be it to give the necessary slope of the blade. There are several such corners, they will be designed for different sharpening methods. For fixing the guide, you can use nails without hats. They are driven into the base, leaving 10-15 mm, cover paint, apply a corner from above. Painted places are drilled by the drill of the same diameter as nails.
The device works well when there is no cover that closes the sandpaper, but it is not entirely safe. In the case of protection, you can use another set for sharpening. A wooden bar with a vertical slot under the knife is installed on the side of the powerful sides. The height is selected with such accounting so that the angle of the flame blade corresponds to the desired condition. The knife is inserted into the neckline and slides on it.
 Such an electric sharpened has a significant drawback - it is difficult to set the angle of sharpening. To get rid of it, the design should be complicated. For this, a tricycle holder is installed with the possibility of controlling angle. It is attached directly on the emery, but can also be applied as an independent device. For the manufacture of such a device, skills and special machines are needed, and this is not every suitable.
Another minus is that when using an electric machine for sharpening the knives, a stone is stepping. Its in the course of work will have to constantly correct to make the blade sharp. In addition, with this method, the emotion is irrational, it has to change it, throwing a significant part of the abrasive.
Homemade devices
Some owners use a hand-made grinding machine for knives with adjustable sharpening angle. The essence of such a device is reduced to the fact that one of the elements (knife or abrasive) is in a fixed state, and the other is returned progressive movements. Two groups of such machines can be distinguished:
- with a fixed abrasive;
- with fixed blade.
 The first group belongs the machine-cart. On a flat plane is installed abrasive. As such a surface, a treated stone or thick glass can be used. For the manufacture of the holder, a board with a thickness of 2-3 cm is cut, it should be about 1.5 times more abrasive material, the width of the decisive role does not play. For better view And the flat surface is treated with a planer and emery paper. In long edges, the stops needed to give strength are nourished and glued.
Then you should make wedges. For this, the processed board is taken again, and the rectangle is cut. Its thickness should be equal to the height of the abrasive material, the length of roughly corresponding to the holder width. To calculate the width of the device, you need to calculate the length of the abrasive length from the holder length and the width of two stops.
As a collected form, such a picture is obtained: an abrasive and wedge should fit on the holder between two stops. After that, the rectangle is cut diagonally, but not from the angle to the corner, but with a low indent, so that triangles with cropped vertices are.
 When the wedge and abrasive are laid in the holder, on the reasons of triangles, they begin to lightly beat the hammer. These items must pass on each other, their total width increases, and the abrasive is clamped. So that the holder did not move on the glass, the bottom of it is pasted with fine rubber.
The trolley will allow the knife to move, keeping the unchanged angle. Wheels can be anywhere, you can apply bearings, the main thing is that they are smooth. The guide with the blade holder is attached to the trolley. Here too there are two ways to adjust the sharpening angle:
- changing the height of Abrasive;
- turning the guide with the blade (in this case, the cart must have 4 wheels).
In the second variant, you can use a rotary mechanism.
Other models
Machines in which the tool is still being processed are greatly popular. A kitchen or other knife is attached on the inclined area. Reliable fastening is obtained using a magnet, all sorts of clamps (spring or threaded) are also widely used.
 To the site from the opposite side of the knife the rod is mounted. It is allowed to use a steel rod with a diameter of 8 mm. The slope of the site is chosen so that it approximately matches the desired corner of the tool. A retainer is attached to the rod, which, if necessary, can move, thereby accurately installing the angle. The guide is freely moving in it - the same metal rod, like a bar. For better sliding in the retainer, plastic or byproof sleeve is inserted.
At the other end of the guide (near the stuffed tool), two brackets are installed, which are tightened with nut or lamb. The bar is inserted into them and fastened with a lamb or nut.
 The machine operates as follows: In the clamps on the inclined area are placed with a blade, brackets on the guide tightened the bar, the desired angle is installed using the retainer. The angle is measured by the transporter installed on the blade. Bru is beginning to make progressive movements, treating the entire surface. During grinding, the abrasive is moved only in one direction - from the heel to the blade.
In another machine, a trapezium is used. Long sides are made of steel rods interconnected by wooden bars. One rod through the bearing is mounted in a swivel mechanism, the other is a guide, which is fluently moving the bar. The knife stand is installed under a carriage on a flat surface. If when the tool is sharpened, the first rod of the trapezium will interfere, the stand can be raised higher.
Determine the quality of sharpening will help fine paper, such as a newspaper. It is necessary to try fast and smooth movements from her stripes. If it succeeds, it means that the blade is sharpened correctly.
Dear visitors of the site "Visiting Samodelkin »From the material presented by the author, you will learn how to independently make a full-fledged emery from the engine from the washing machine and install for example in your workshop or in garage.
For a master person, this machine is simply indispensable, because you constantly need to be molded). Buying the factory emery of good quality today will be expensive, and it does not make sense to take a cheap, because the age of it is not a lot. The best option to make Eoths independently, the tradition of using engines from washing machines for the manufacture of this machine, has seen since the USSR. Surely, many still have such emery and work perfectly for several decades)
And so, let's look at what exactly did the master for the assembly of the sandpaper?
Materials
1. Engine from washing machine. 220 V 2826 rpm 370 W
2. 2 capacitors with a capacity of 3 μF
3. Grinding circle
4. Corner
5. Prof. Square
6. Rubber corks from bubbles with antibiotics
7. Switch (toggle switch)
8. Wires
9. Fork
10. Galvanized tin
11. Flange for fastening the engine
12. Bolts, nuts, washers, Grovers
13. Paint
14. Solder
15. Isol
Instruments
1. Bulgarian (USM)
2. Welding machine
3. Drill
4. Visits
5. Metal ruler
6. Marker
7. Hammer
8. Metal scissors
9. Screwdriver
10. Wrench
11. Salvik
12. Pliers
13. Knife
14. Brush
15. Tag
Step-by-step instruction for assembling emery do it yourself.
As already mentioned above, the best option is the use of the engine from a washing machine, for sure many have old styles, which still sorry to throw out or pass in scrap) so take a motor and make sharpened) like this looks like the heart of the car.

TTX is necessarily indicated on the housing, or the tablet is screwed to it.

The grinding circle can be purchased in the store, but many stacking owners are full of such good in the garage.


Manufacturing counter bolt.

Singing risk under a screwdriver.

Split.


Transfers the circuit of molds on a metal corner.

Sheeps with a grinder.

Trial fitting and fit.

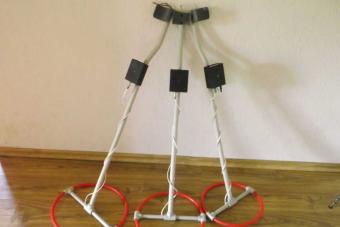
The support frame of the grinding machine will be made from profancal and square tubes.

The workpiece is attached to the workbench with the help of a clamp, the author does cut with a grinder.

Surfaces to the ratio with another pipe.

It will look like this in the future.

Cuts off the edges of the metal, so that it come to the supports.

Again fitting.


For an uninterrupted start of the engine, 2 condenser was taken and are interconnected like this.

Tries to insert elements on their rightful place.

Everything perfectly approached, again collects the design for the assessment.

The surface of metal parts is thoroughly grinning with a grinder and a metal brush.

After that, the master embarks on the welding of the machine itself.

Rigs the mount for the engine.

Sets capacitors.


Then pulls off with a flat file.

The same operation holds on the other hand.

This is the detail as a result. These holes serve to move the table on the guides,
And the working surface of the table itself will be smooth.

Additionally, the stand and the table top herself.

Weld into a single design.

Sensoring.

Trial installation.

So it should look.

With a mounted grinding circle.

As you understood the table, you can move and move away, pre-weakening the mount.

After that, the thread required for the installation of rubber stoppers is cut into the legs.


So as not to be painted the paint workbench, it is necessary to put a newspaper under the stainable object)

Here they are rubber corks from bubbles.

Screen directly to the legs.

That's what we get in the end.

To enable and turn off the emotion, the wizard connects the switch.

Connects wires.

Bashes on the machine housing.


Names the center.

Removes and tries.