It's no secret that after the repair work is completed, the remaining materials end up in the house. Thrifty owners are in no hurry to get rid of these things. It turns out that many crafts can be made from them.
Pieces of pipes and extra fittings are no exception. crafts from polypropylene pipes allow you to realize any fantasies and make useful things for household use with your own hands.
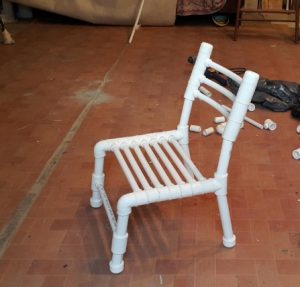
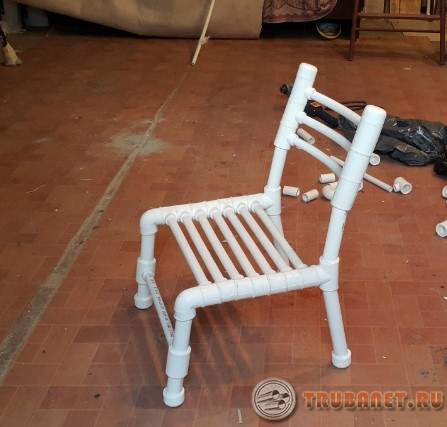 DIY crafts in the form of chairs made of polypropylene pipes are easy to install, for this you need to prepare:
- medium-sized trimmings and fittings suitable for them;
- plywood and, if desired, foam rubber can be added;
- upholstery fabric;
- hacksaw, stapler and screws.
The sequence of actions when creating a chair with your own hands:
- Legs are constructed from pipes and fittings using a soldering iron.
- A square or rectangle of the required size is cut out of plywood, it is covered with foam rubber and upholstery fabric. The fabric must be prepared in such a size that it can be fixed on the back with staples.
- The seat is fixed on the legs with self-tapping screws.
- The back is made in the same way.
Video: making a chair with your own hands
How can I use the remains of polypropylene pipes in the garden
By adding a little imagination and creativity, you can design interesting and stylish furniture crafts that will decorate any room.
Video: furniture
Shelves in the children's room
 Not every young family can allocate big money from the budget for the purchase of expensive furniture.
An alternative method is self-assembled pieces of furniture from plastic pipes and elements for connection.
The main parts for the shelves are pipes and couplings. They will be supported by a frame made of PP pipes. And plywood shelves are attached to it with screws.
Video
Miscellaneous little things
Organizers. They can be placed near the desktop and they use pipe cuts of the same size. For ease of attachment, one end is cut at an angle.
Video: various crafts
Craft in the form of a stand for storing shoes
 From a large number of equally cut polypropylene pipes, you can fold and fasten a convenient shoe rack. Such structures save a lot of space in a small hallway, and shoes are not stored in a pile, each pair is separate.
The blanks can be laid out in any order and the structure can be fastened in the most convenient form for a particular room.
Video
Clothes dryer with many tiers
Such a device will find application in any home. A stable and reliable structure comes out of polypropylene products.

It cannot be blown away or overturned by strong winds. This dryer can be kept outdoors all the time without rusting or rotting. The convenient design gives the chance at any time to rearrange the dryer in the necessary place.
Video
Hangers for clothes
This is the simplest product, which requires only three small cuts of polypropylene pipes. Two of them should be the same length, and the third should be 1/3 longer.
These three blanks must be strung on a strong rope, which should then be firmly tied. It turns out an isosceles triangle. A wire hook is attached to the top of the triangle.
Video
Pipe-rolling materials made of polypropylene have proven themselves from the very best side. This was facilitated by the environmental friendliness and durability of this material. Therefore, crafts made of polypropylene pipes are in great demand.
A simple installation allows anyone with a little imagination to create a household item that will be used for a very long time.
Greetings, brain engineers! PVC pipes are similar to Lego for adults, so having a small supply of such pipes at home is not at all bad. brainidea!
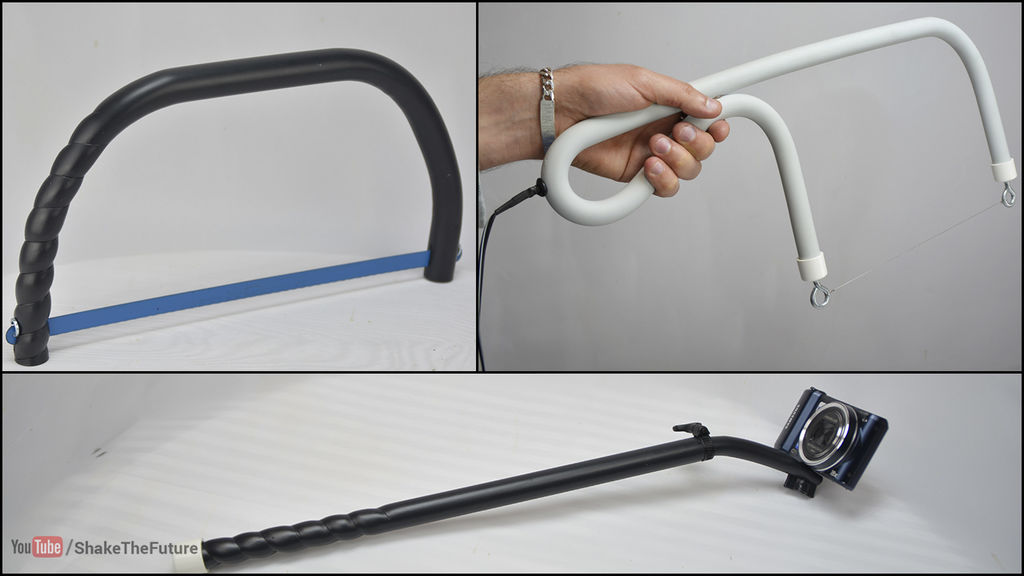
In this brainguide we do it yourself we will create three things from plastic pipes - a foam cutter, a hacksaw and a selfie stick. To do this, we need an industrial hair dryer and a pipe bending spring.
And also to create a cutter:
- PVC pipe and two plugs to it
- nichrome wire (I took 26 gauge)
- universal power supply (similar to the one I used)
- heat shrink tubing, wires and terminal washers.
For hacksaw:
- PVC pipe
- hacksaw blade
- steel wire
- groove washers.
And for the selfie stick:
- PVC pipes of two diameters (one pipe should fit quite tightly into the other)
- steel wire
- PVC plug
- appropriate size bolt for your camera.
If the submitted video with the process of this brainguide not playable on your smartphone, then go via alternative link.
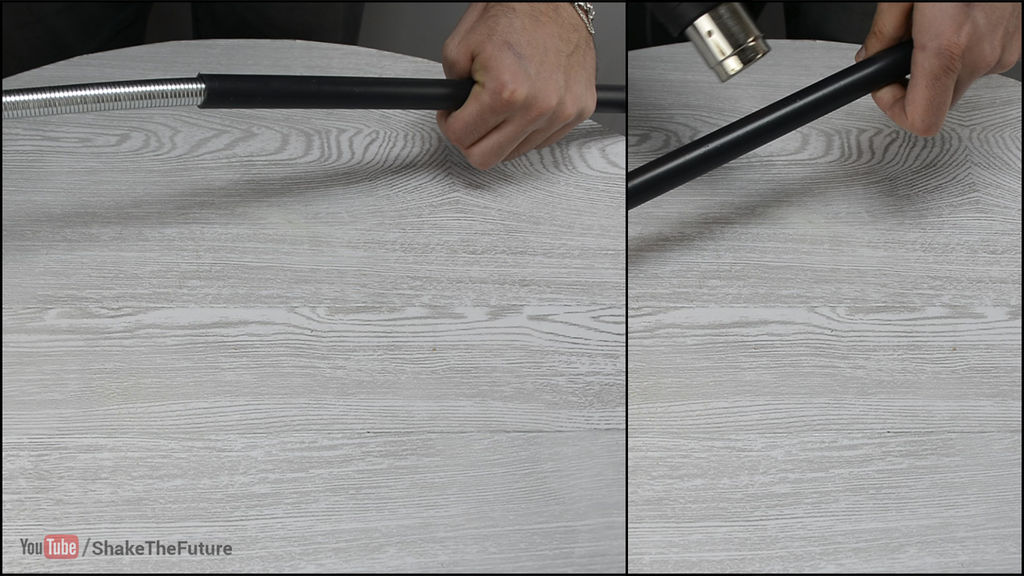
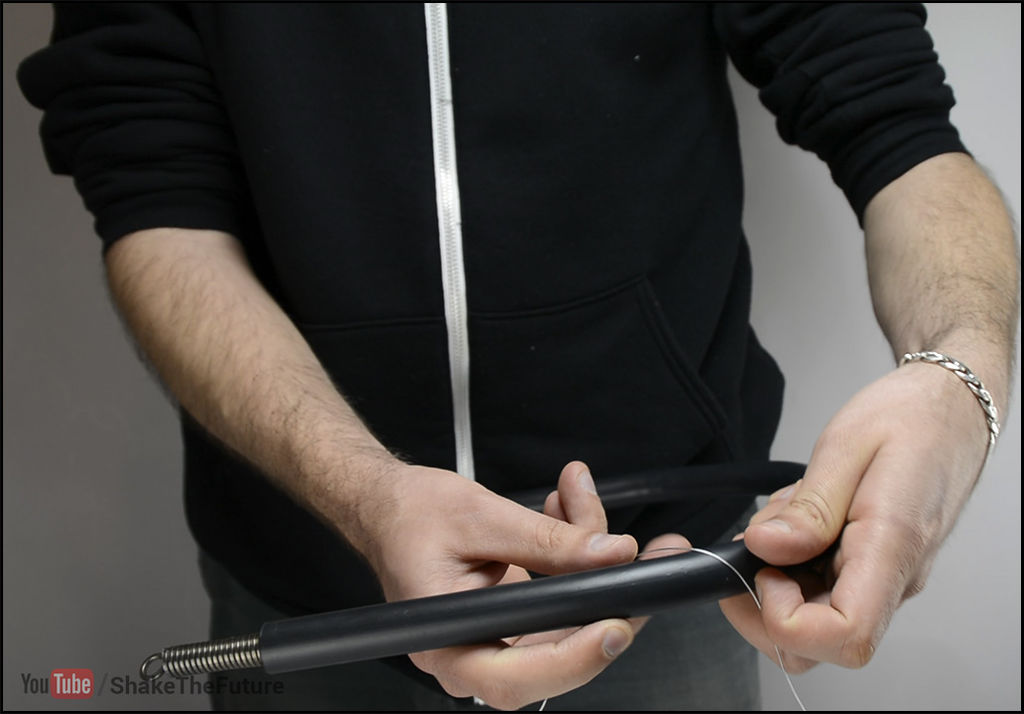
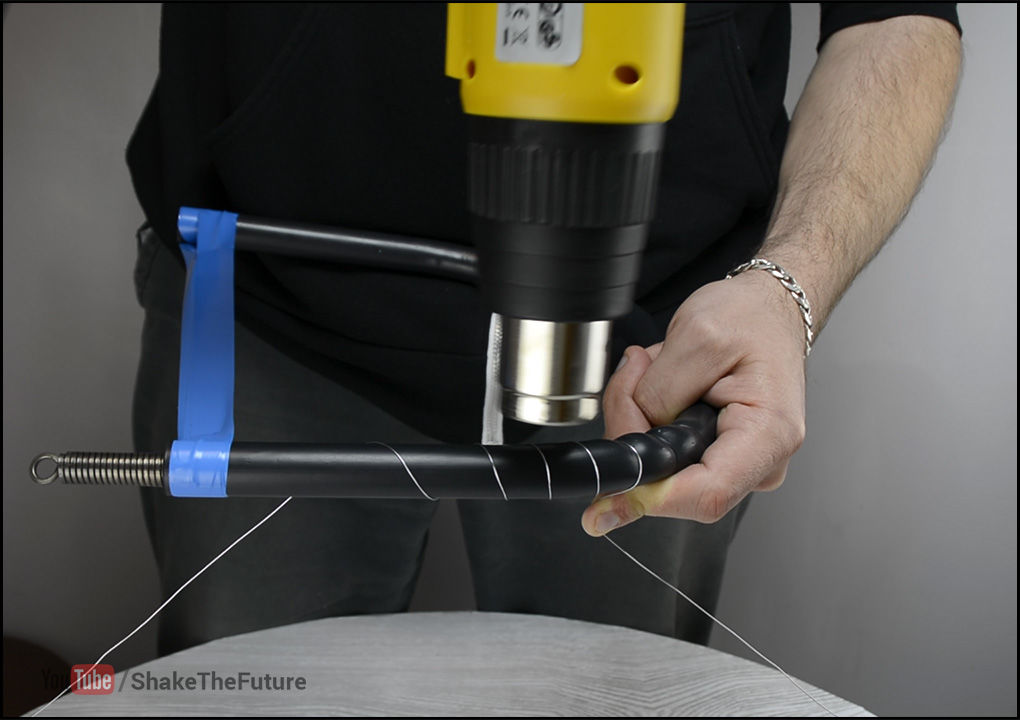
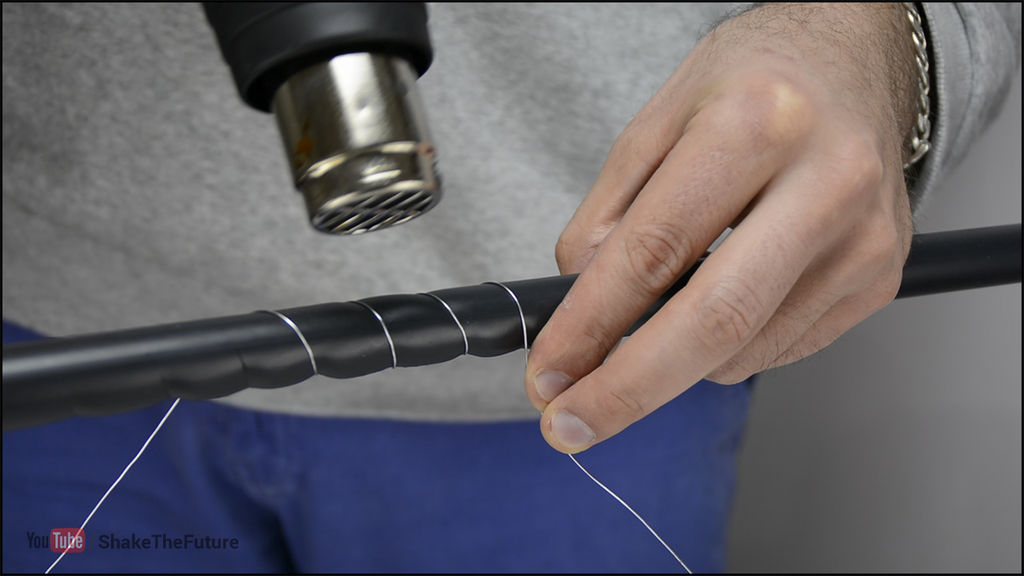
Step 1: Foam Cutter - Pipe Bending
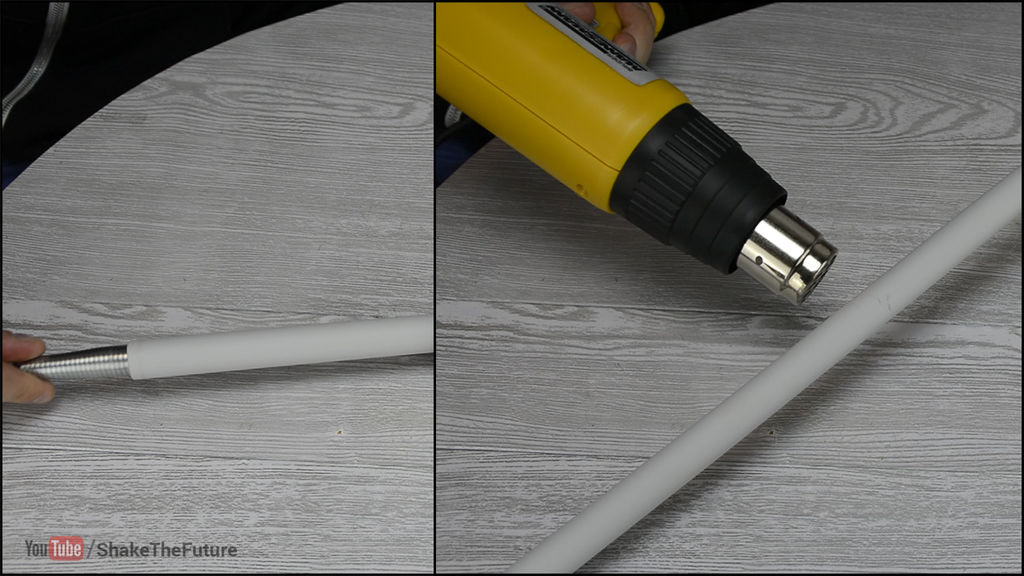

Always wear a RESPIRATOR before heating plastic tubes!
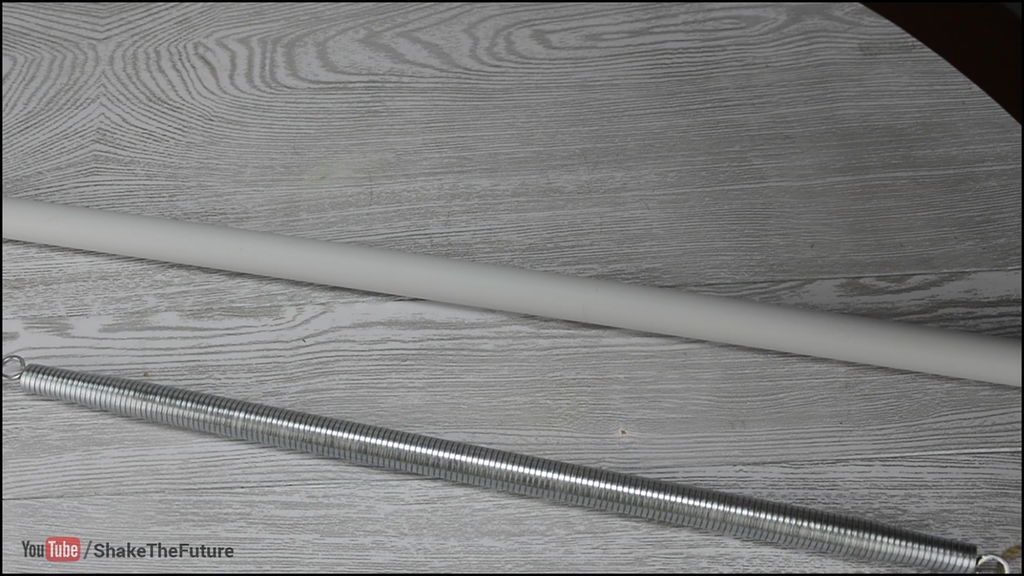
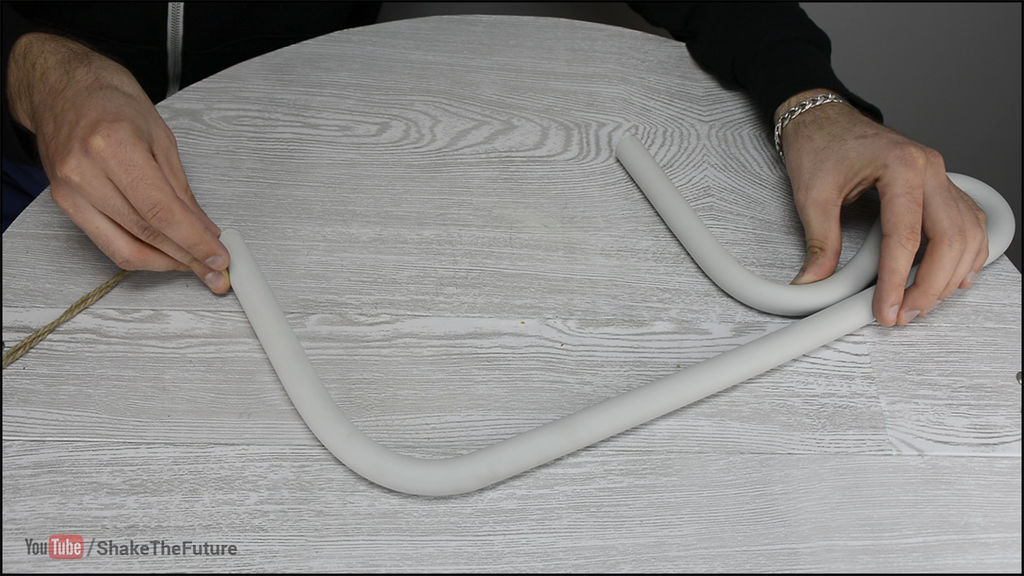
We take a bending spring and place it in a PVC pipe. We heat the place of the future bend and carefully bend it. We repeat brain procedure until the pipe is in the desired shape.
Step 2: Foam Cutter - Wire Holes

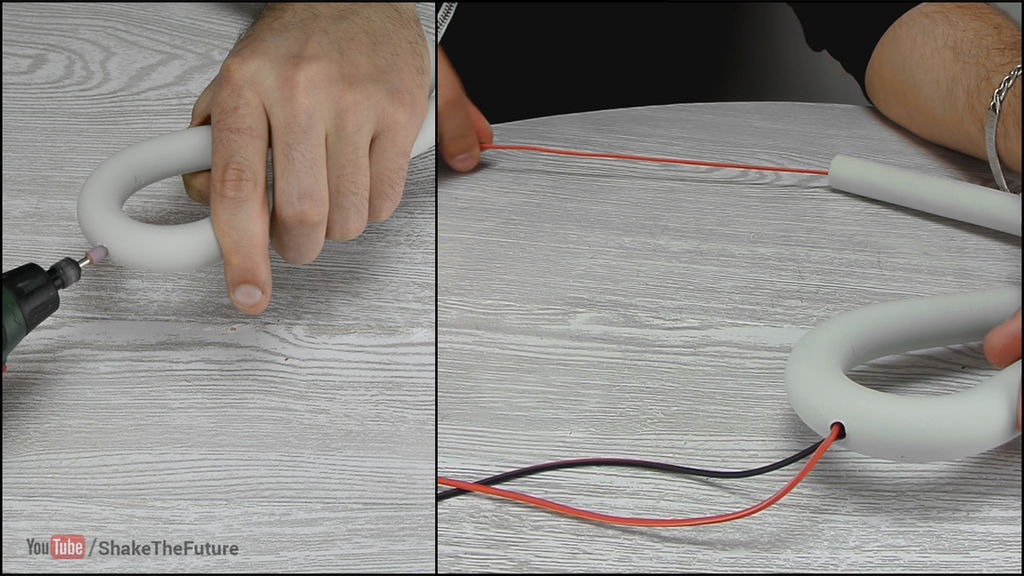
Cut off the excess and drill holes for the power wires.
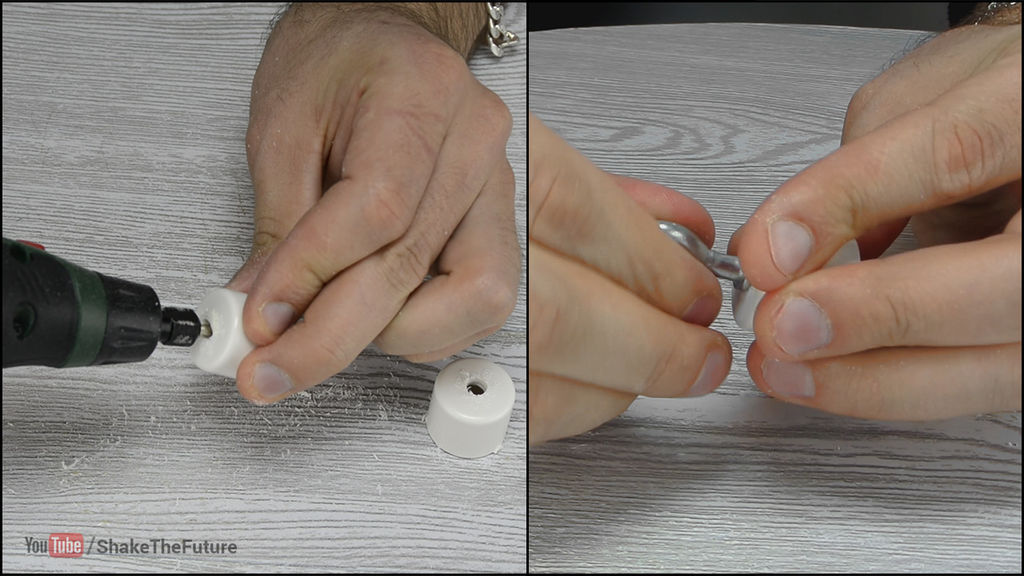
Step 3: Foam Cutter - Plug Holes

![]()
We drill holes for eyebolts in PVC plugs, insert them ourselves brainbolts, we attach the terminals to the wires and fix them on the eyebolts. And then we put the plugs on the ends of the prepared pipe.
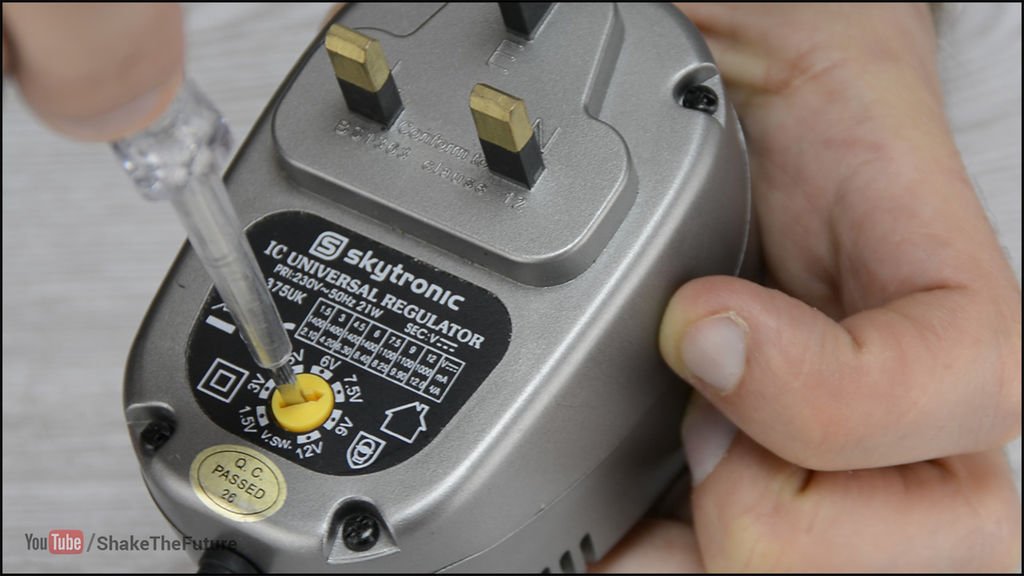
Step 4: Foam Cutter - Power Supply
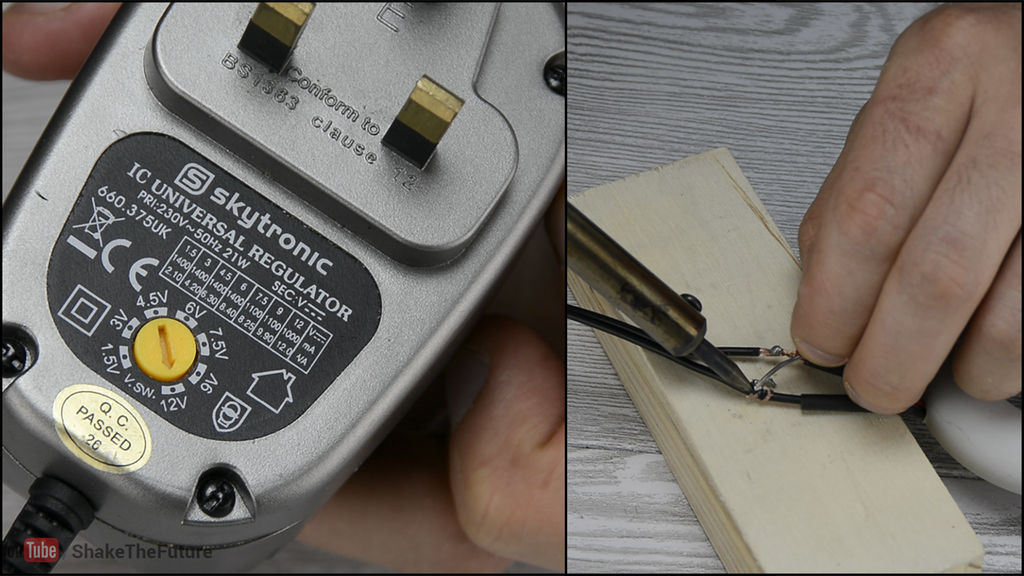
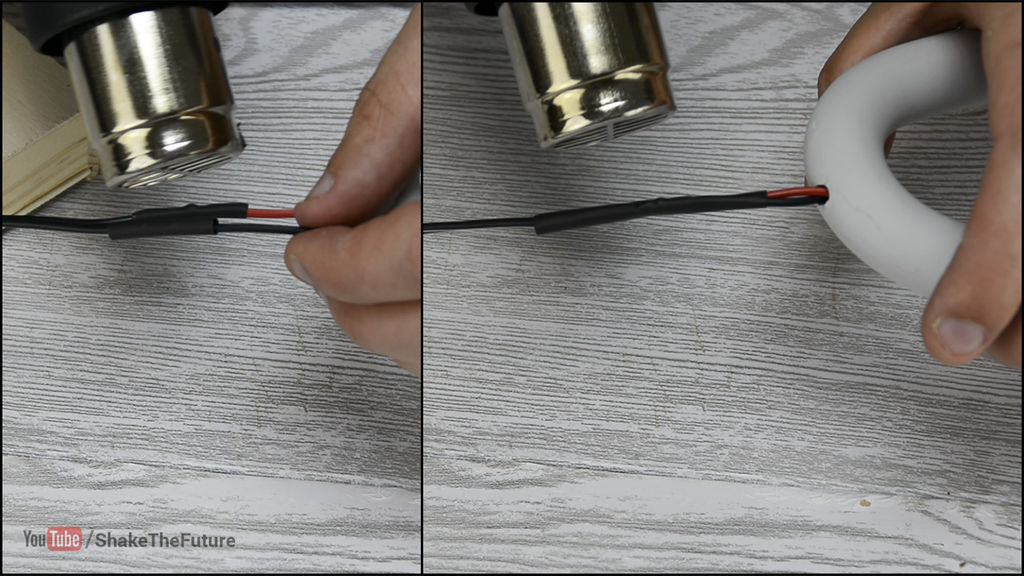
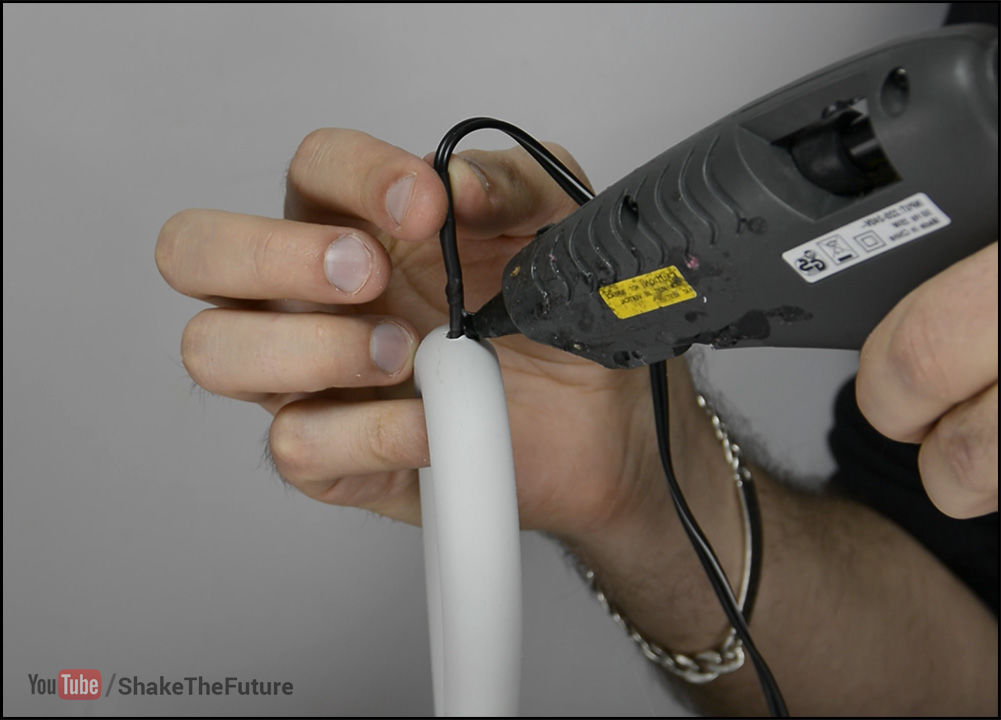
We take a power source (I used a universal power supply) and solder wires to its output homemade, the polarity does not matter, and to isolate the connection, and for a neat look, we use heat shrink tubing. We glue the prepared power wires at the inlet to the tube with black hot glue.
Step 5: Foam Cutter - Finishing the Handle
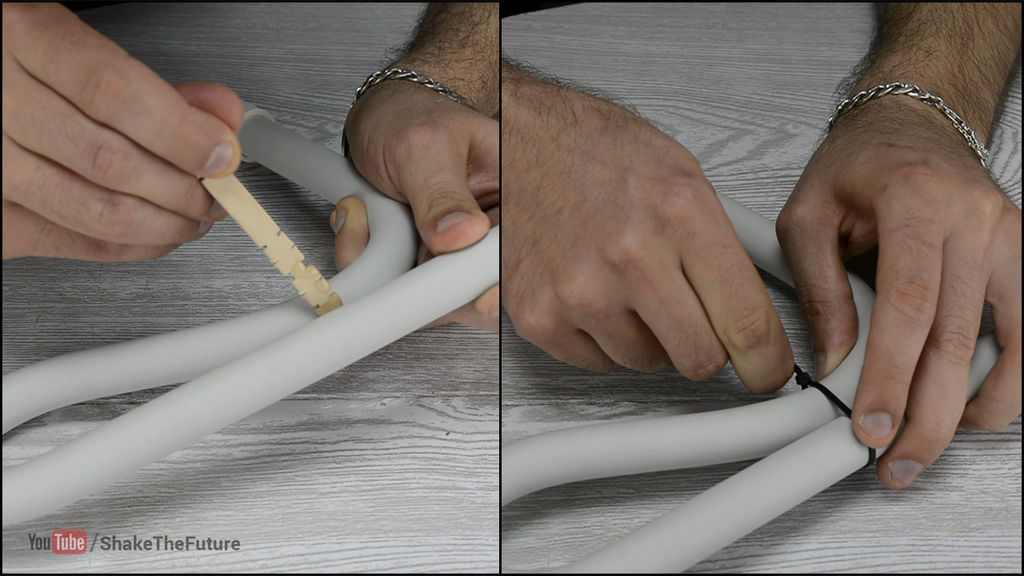
For greater tube reliability brainpens glue together.
Step 6: Foam Cutter - Nichrome Wire
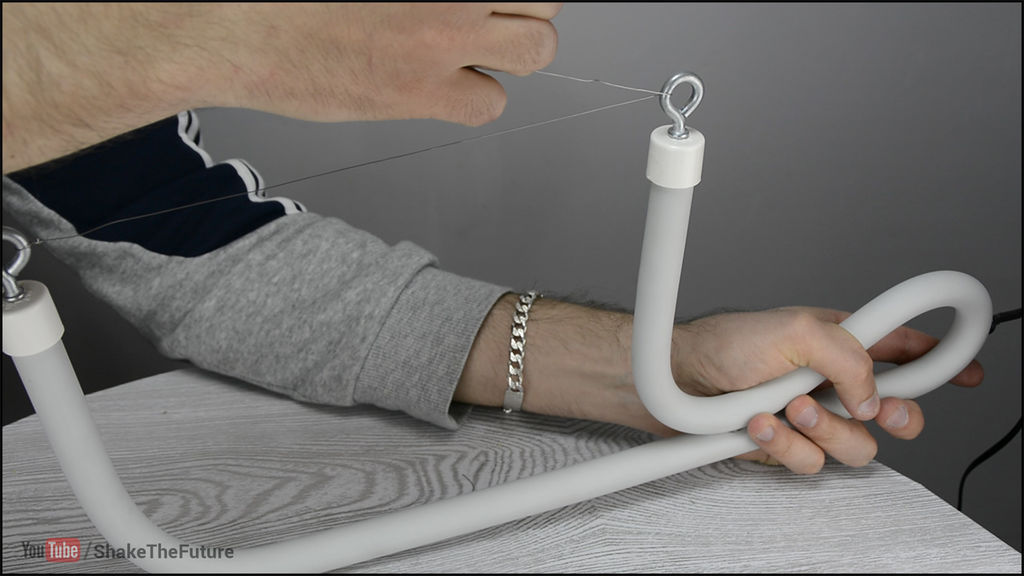
Between the eyebolts we stretch the nichrome wire. Due to the fact that the tube brain crafts elastic, stretched wire will always be in a taut position - both in a heated and in a cold state.
Step 7: Foam Cutter - Set Up
By adjusting the power supply, we set the desired level of string incandescence. And now this homemade You can cut foam like butter.
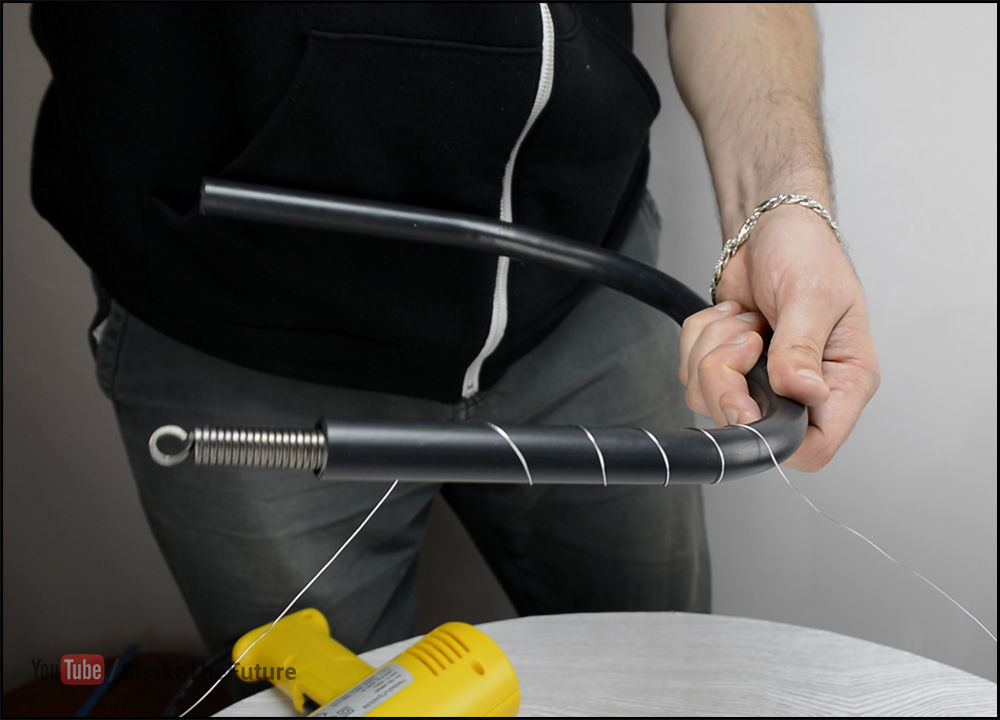
Step 8: PVC Hacksaw - Shaping
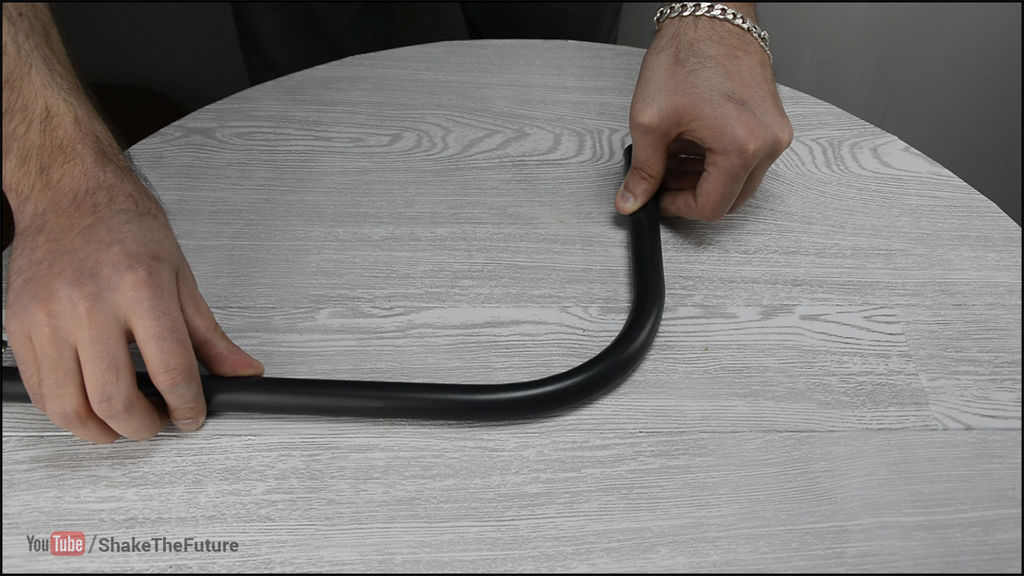
We insert a spring into the tube and heat up the bend. Next, bend the PVC pipe until you get desired shape in the shape of the letter "C".
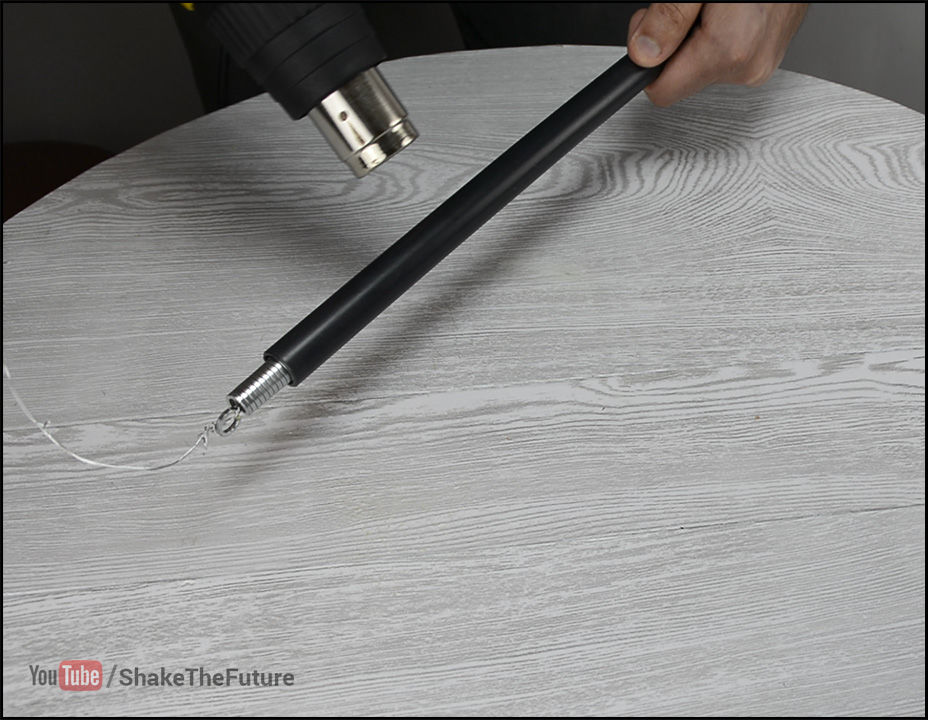
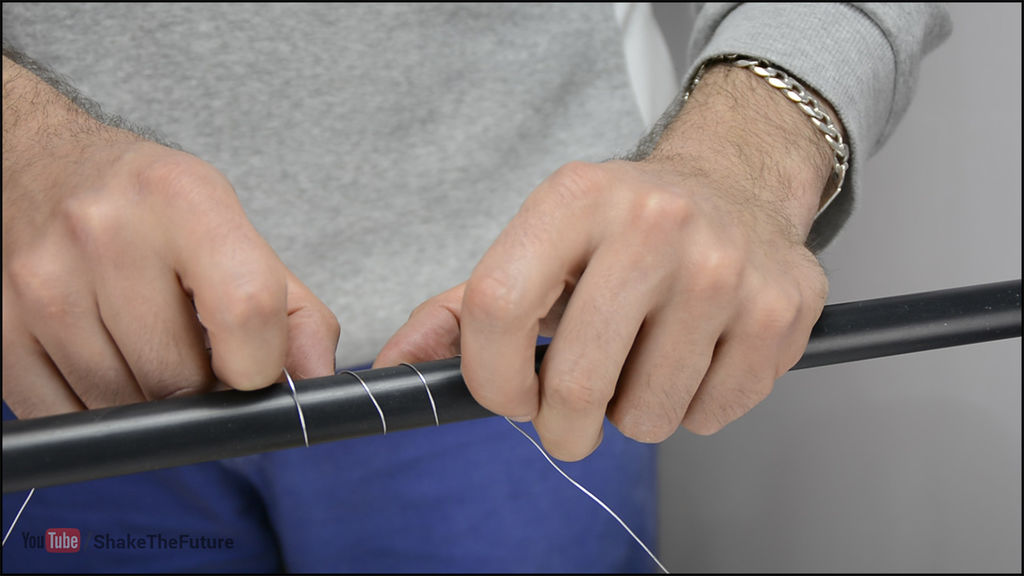
Step 9: PVC Hacksaw - Coil String
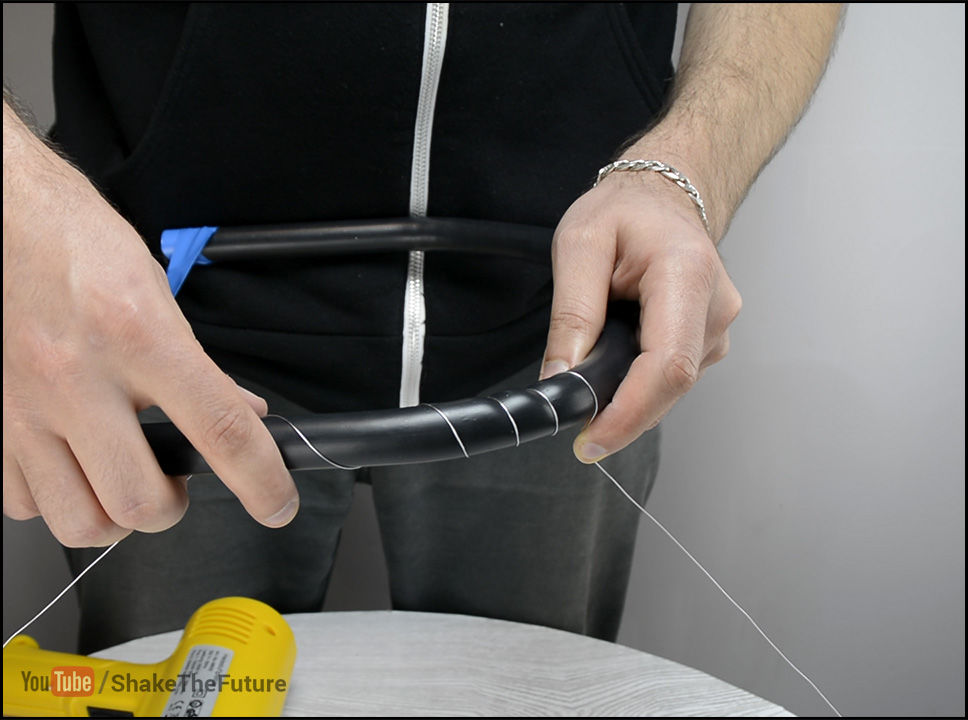
Into the pipe of the future brain cutters we insert a spring of a smaller diameter, wrap the place of bending with steel wire, the ends of which we fix, so I attached them to the table.
Step 10: PVC Hacksaw - Coils
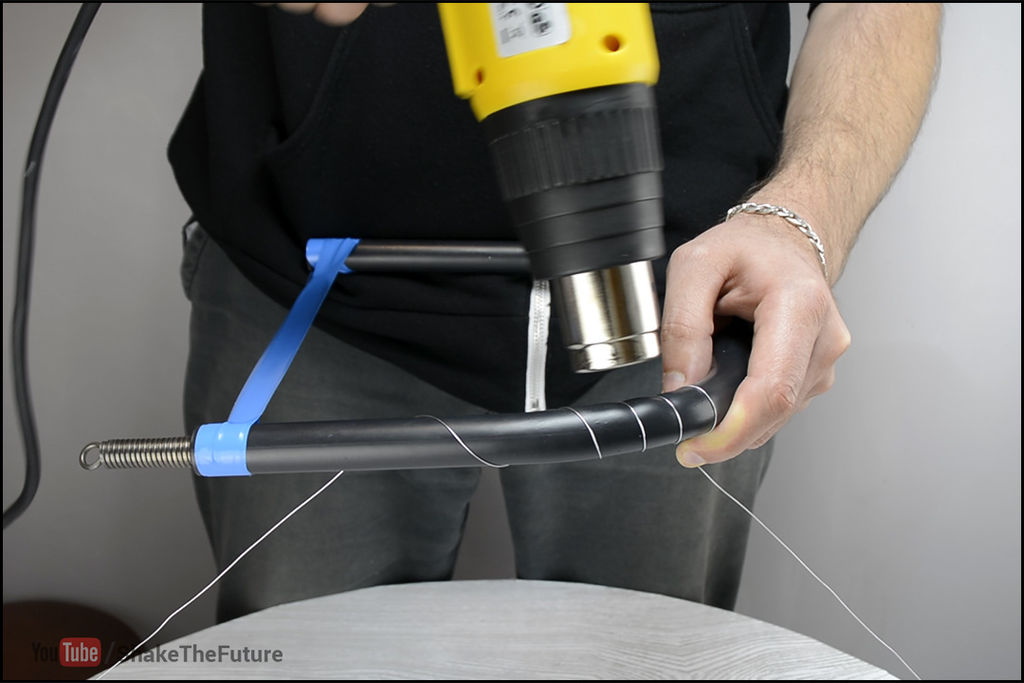
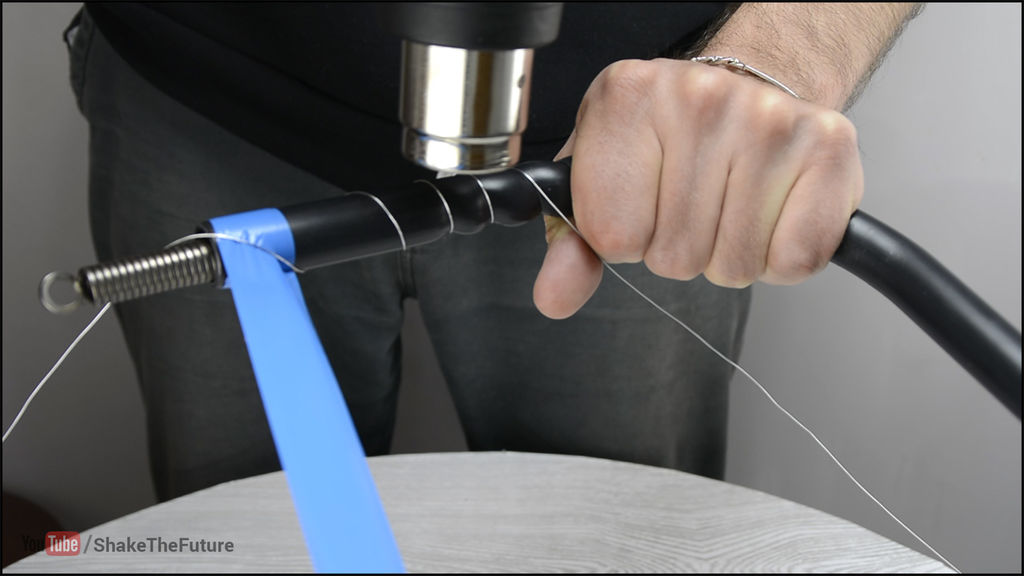
So that the ends of the hacksaw blank do not diverge when the pipe is heated, we fasten them with electrical tape. Next, we heat the area wrapped with wire and create a tension on the wire to form coils. After the pipe cooled down, I shifted the wound wire and repeated the procedure.
We repeat the same steps from the other end brain blanks.
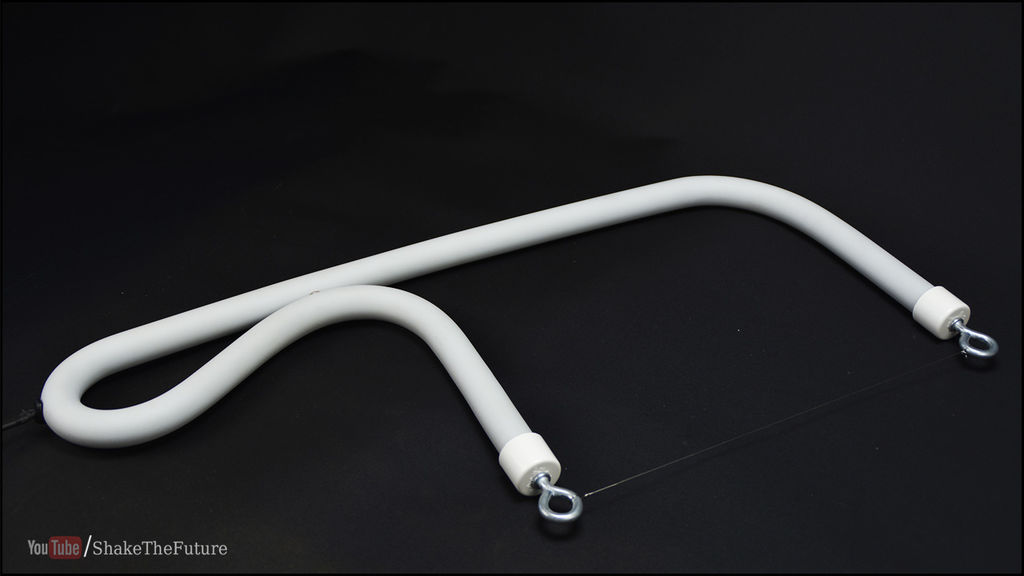
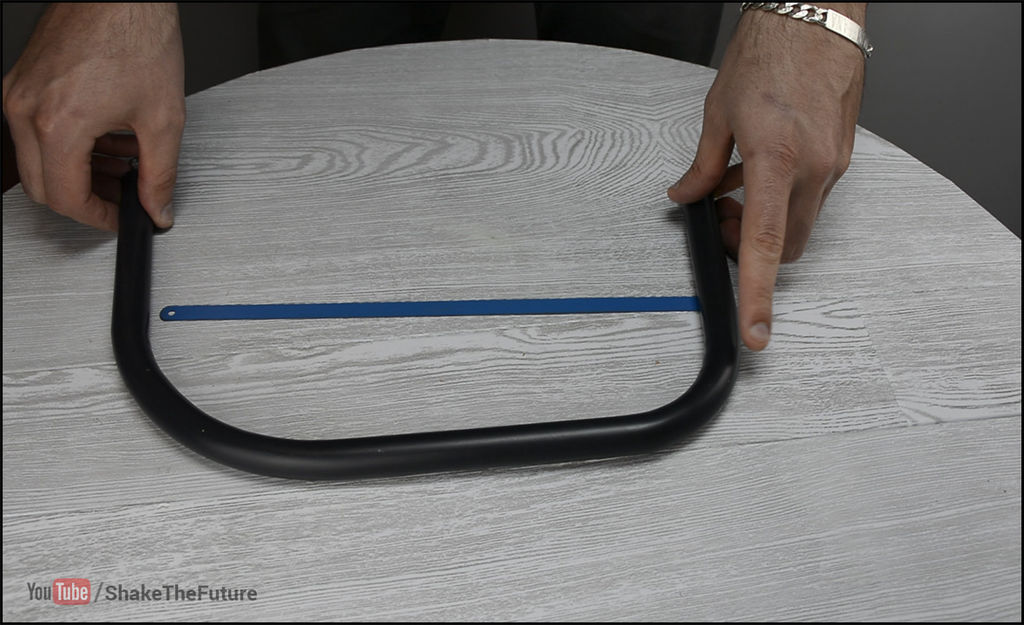
Step 11: PVC Hacksaw - Blade Cutouts
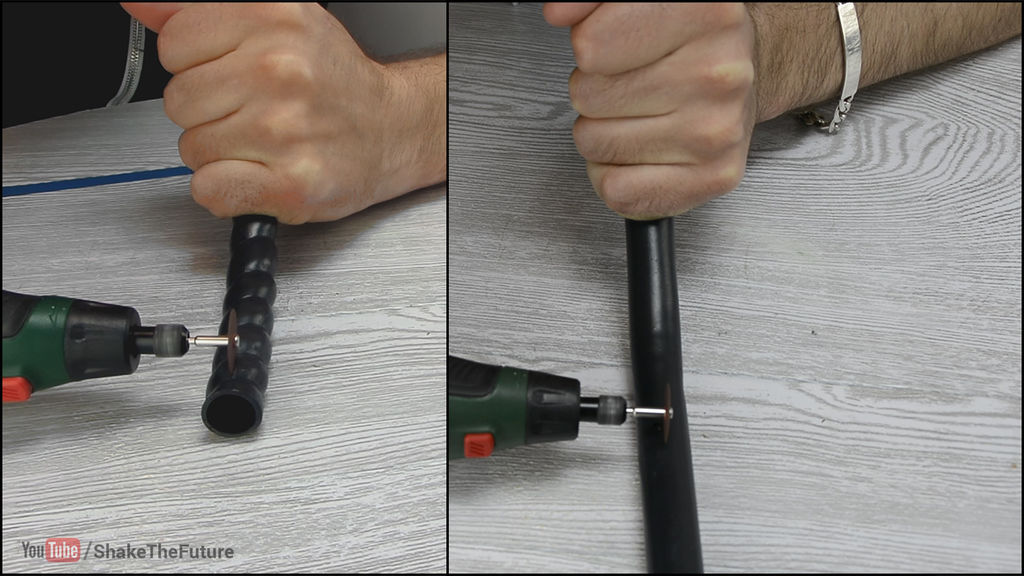
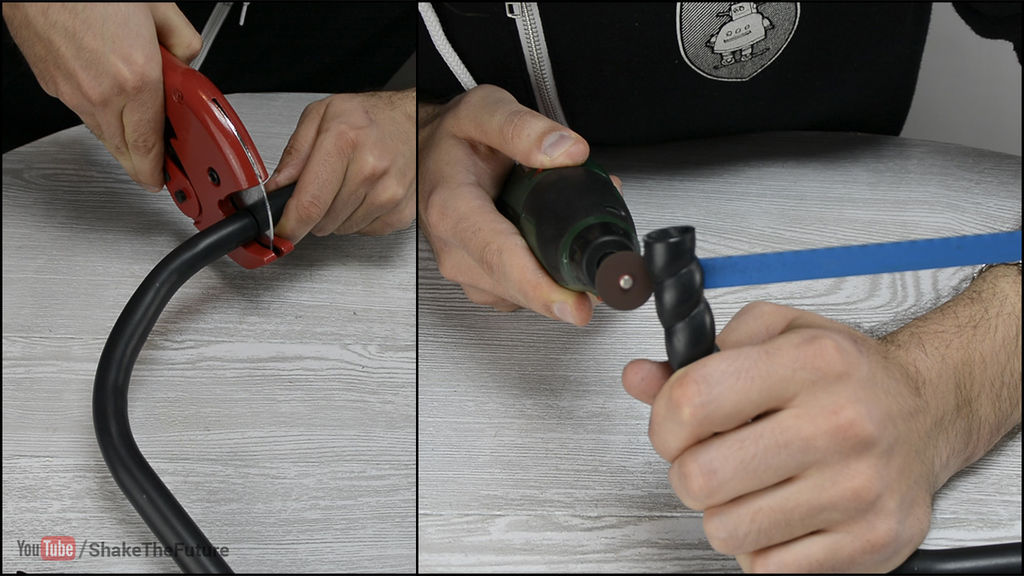
We cut the ends to the desired length, and then we make cutouts in them for the subsequent installation of the hacksaw blade.
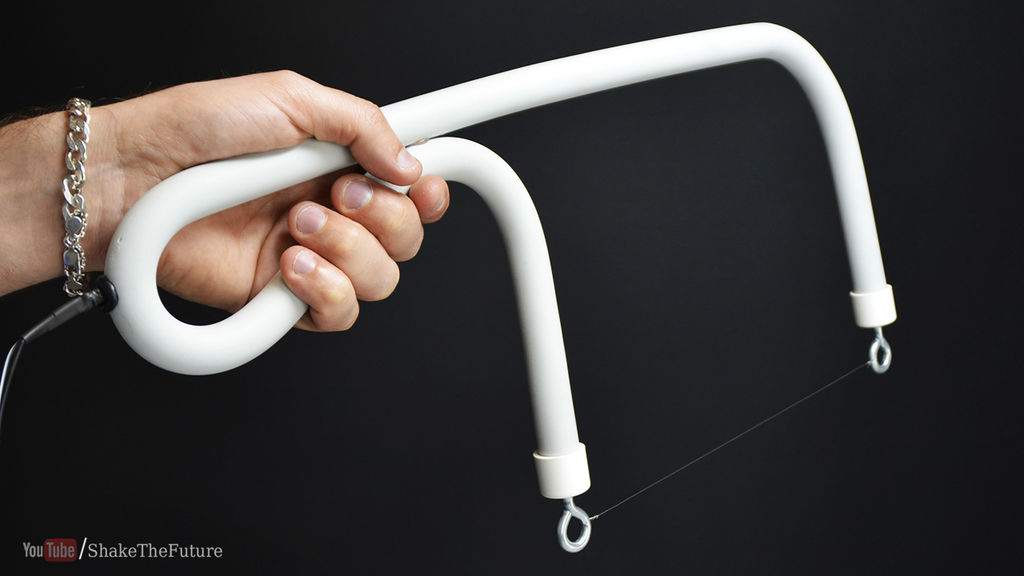
Step 12: PVC Hacksaw - Blade
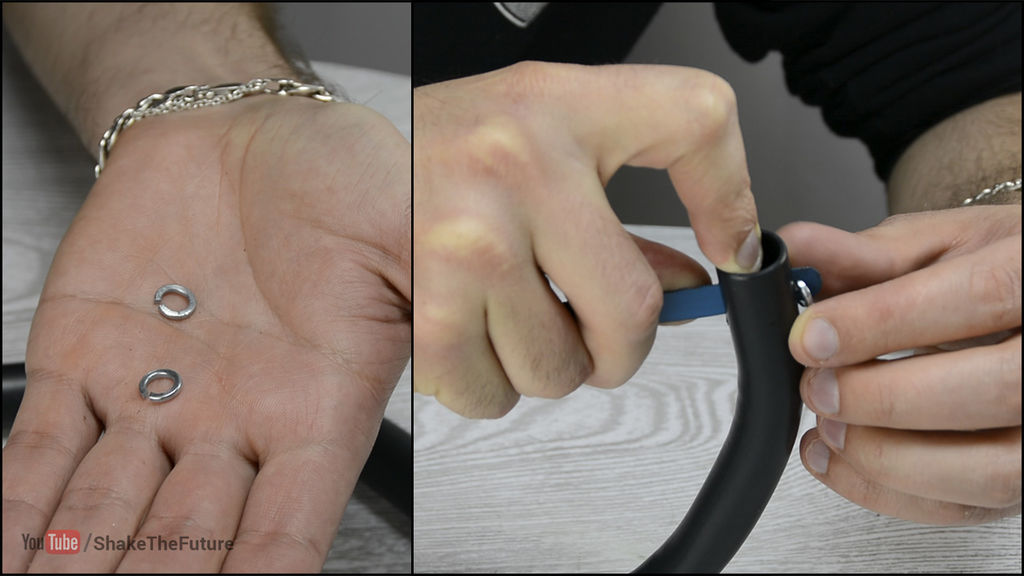
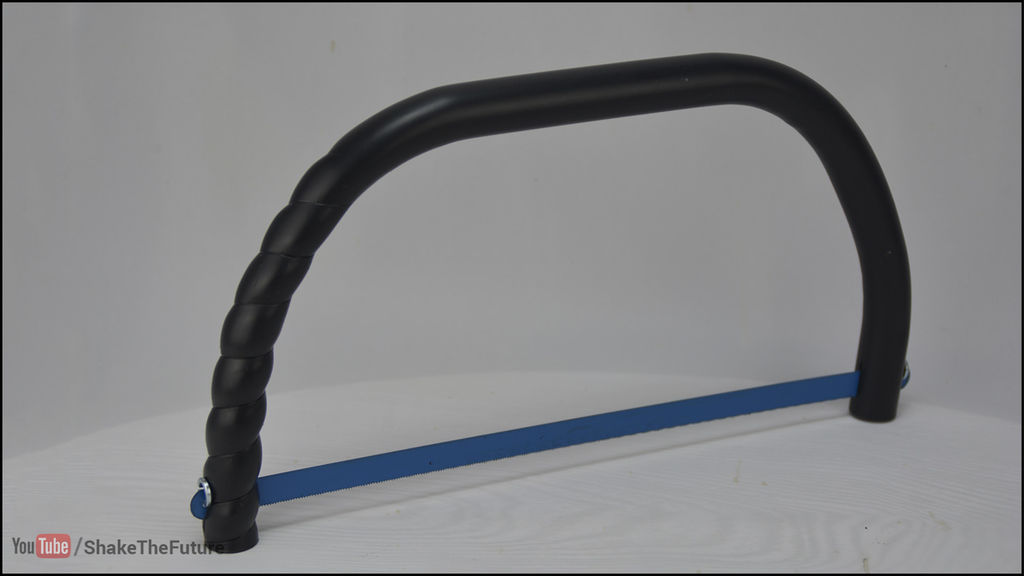
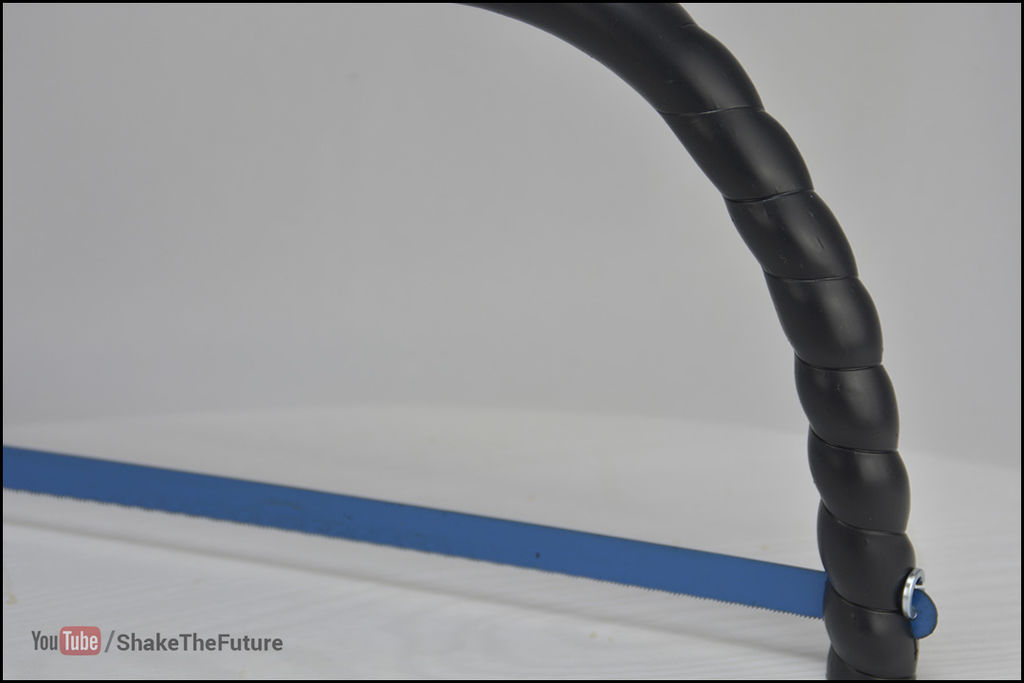
We insert a hacksaw blade, and that's it, a hacksaw- homemade ready.
As with the cutter, the blade will be taut.
Step 13: Selfie Stick - Coils
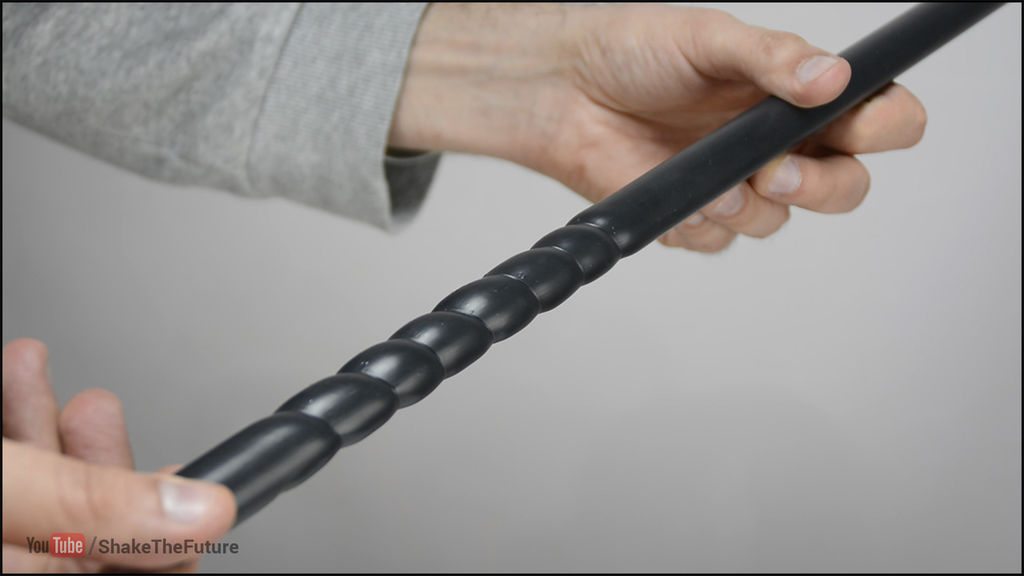
At one end of the blank tube for the selfie stick, we form curls.
Step 14: Selfie Stick - Slits
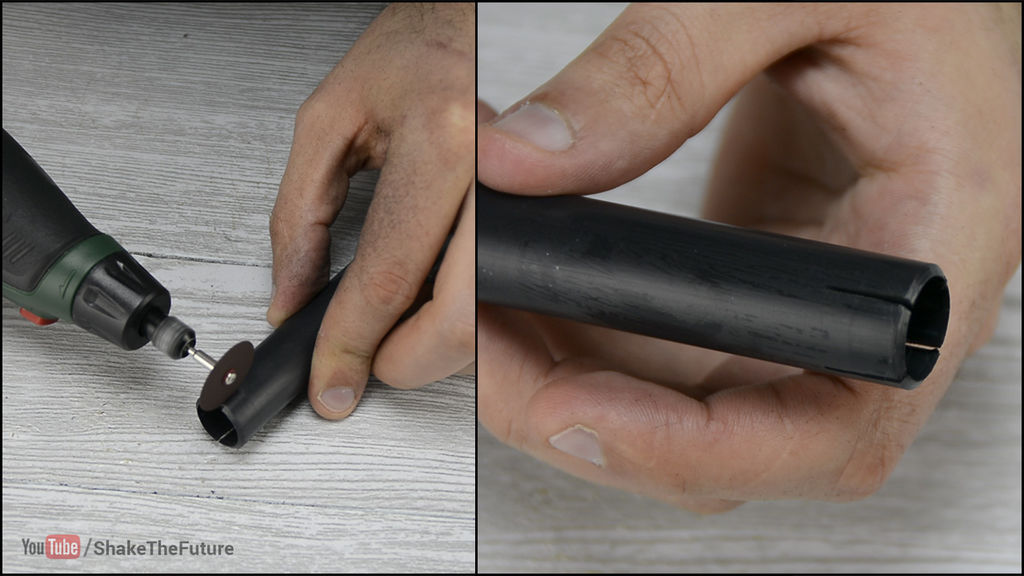
At the other end of the workpiece we make 4 slots.
Step 15: Selfie Stick - Small Tube
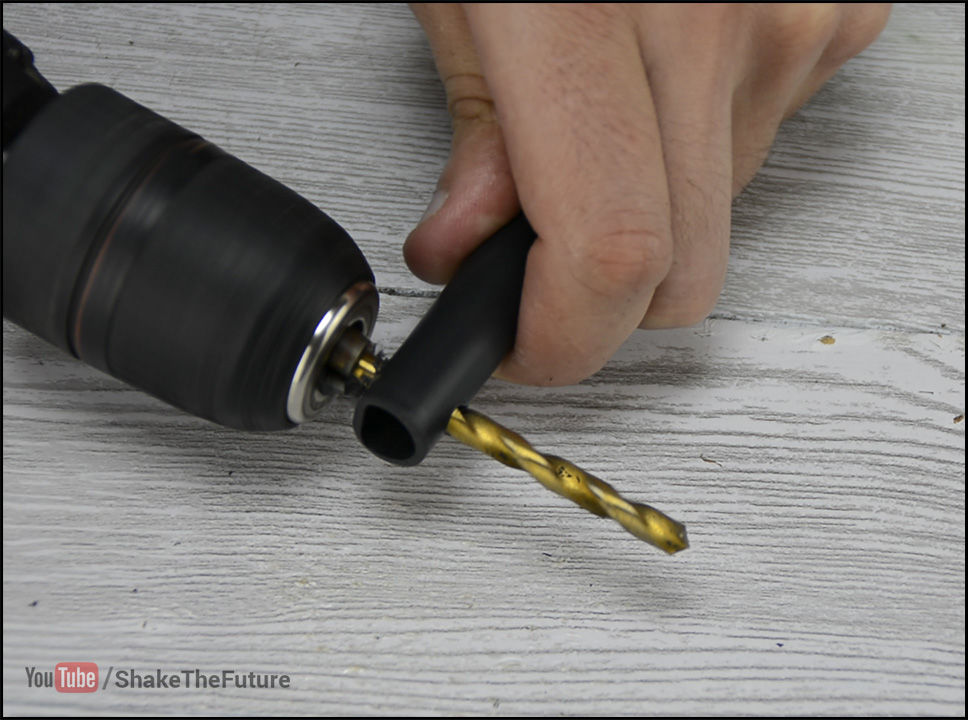
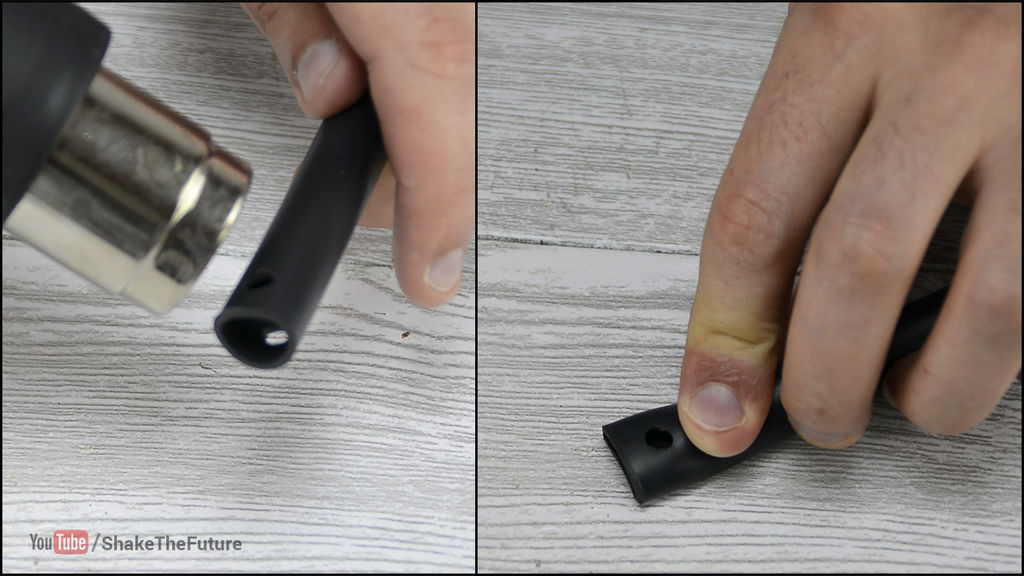
In a tube of smaller diameter, we drill a through brain hole. Then we heat this end and “flatten” it.
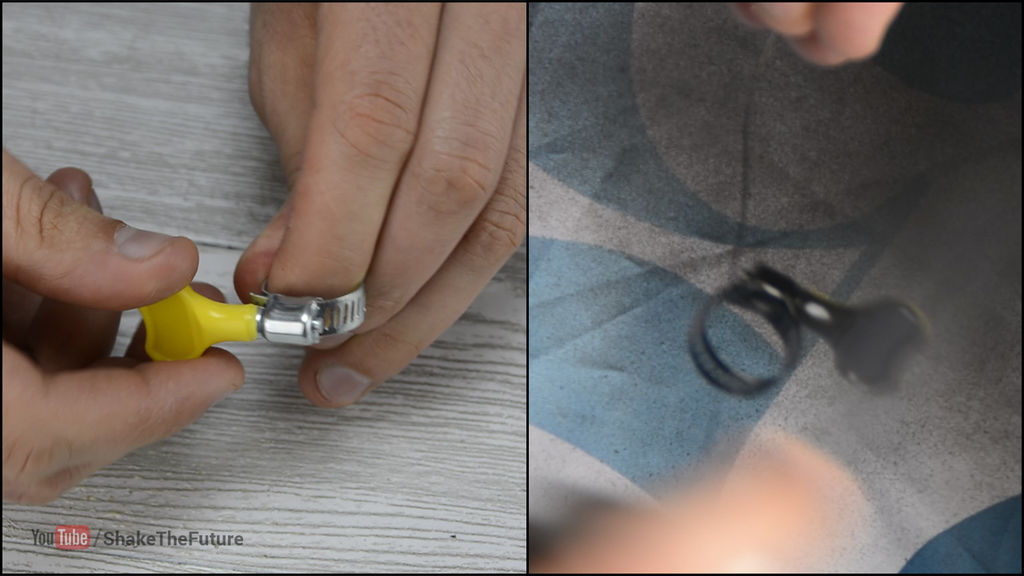
Step 16: Selfie Stick - Fixing Screw
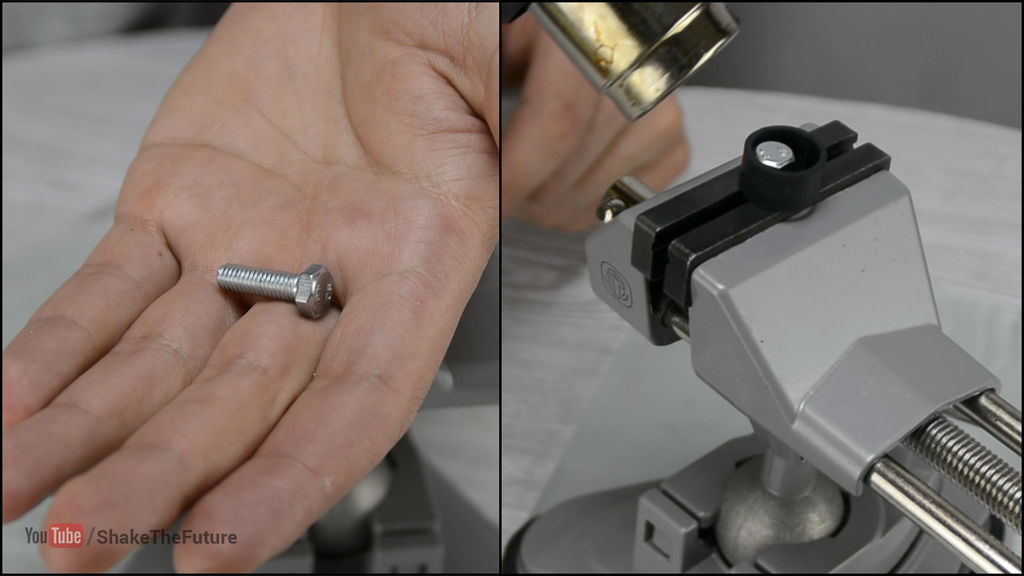
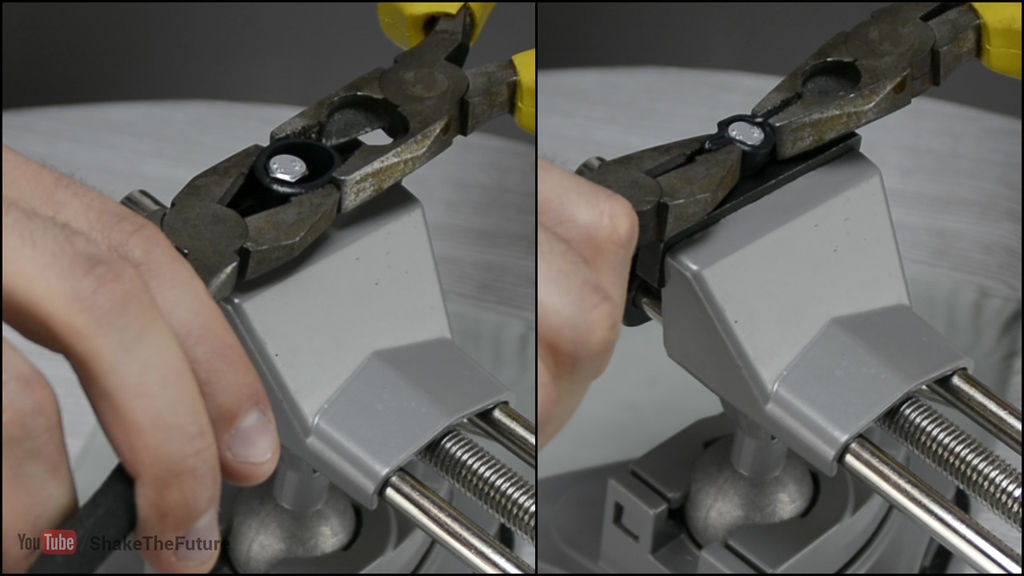

We clamp the selected bolt in a vice and put a PVC ring on it, which we then heat with a hair dryer and squeeze with two pliers from two opposite sides, thereby creating a “T”-shaped screw fixing the camera.
Step 17: Selfie Stick - Mounting the Screw
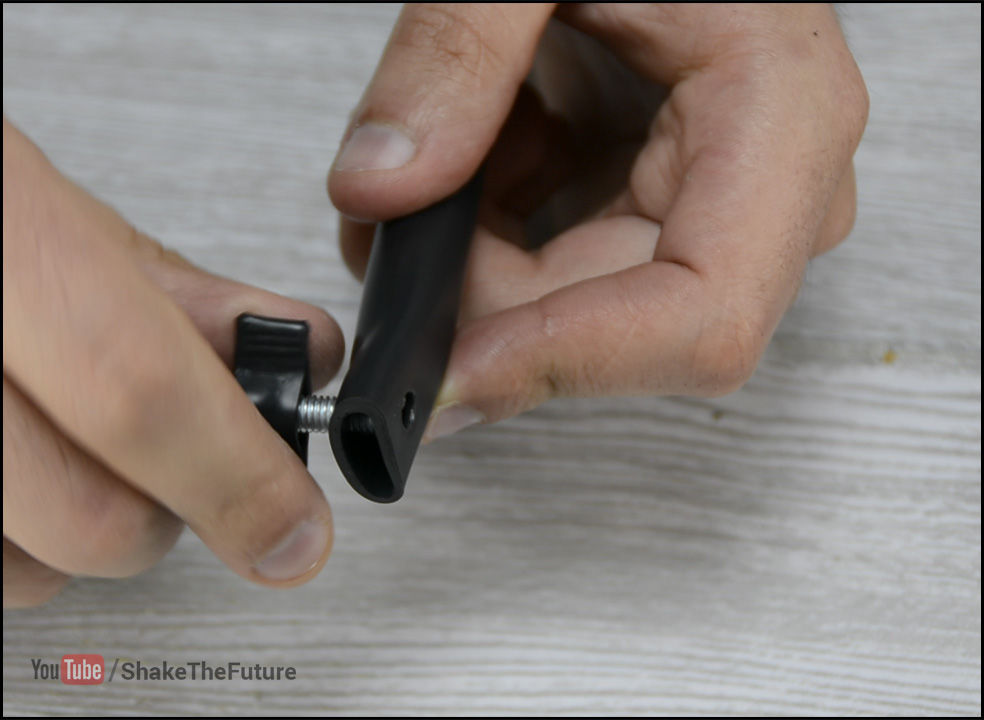

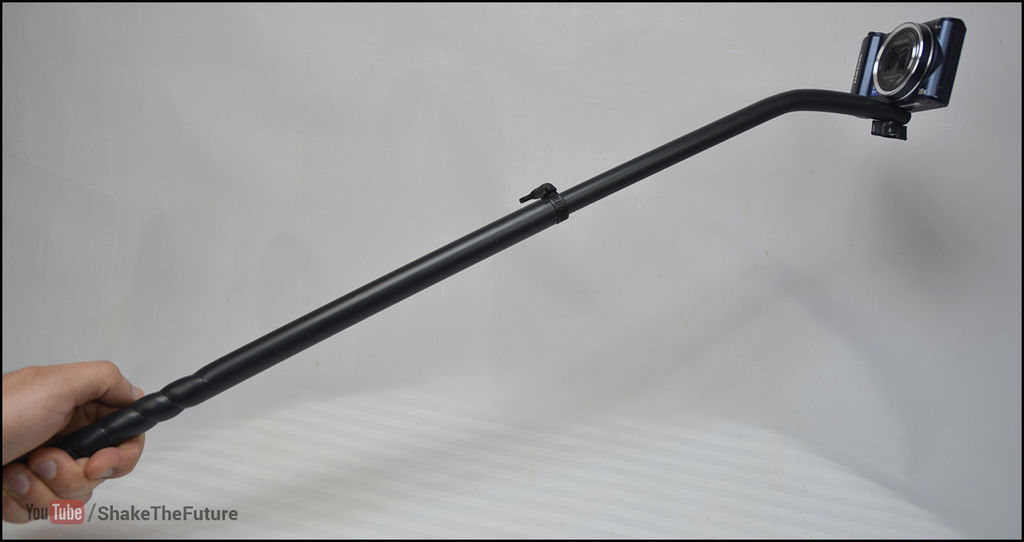
We insert a screw into the hole of the “flattened” end, it will fix the camera on brainwash. I also decided to bend this end so that the camera was at a right angle.
Step 18: Selfie Stick - Connecting the Tubes
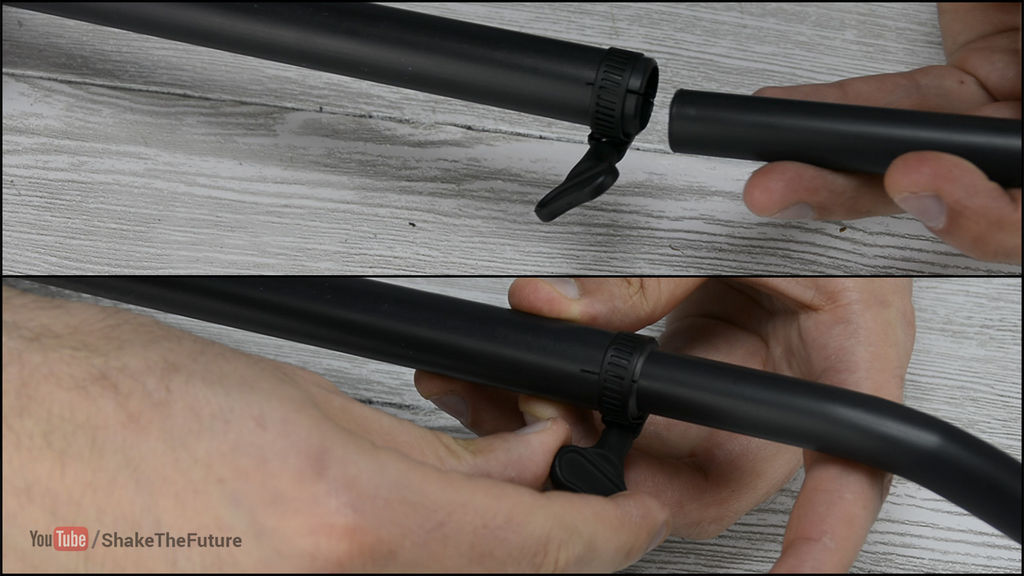
We paint the “lamb” collar in the color of the tubes and put it on the end of the large tube, then insert a tube of smaller diameter into this end with slots. This design allows you to adjust the length of the selfie crafts.
Step 19: Selfie Stick End Cap
![]()
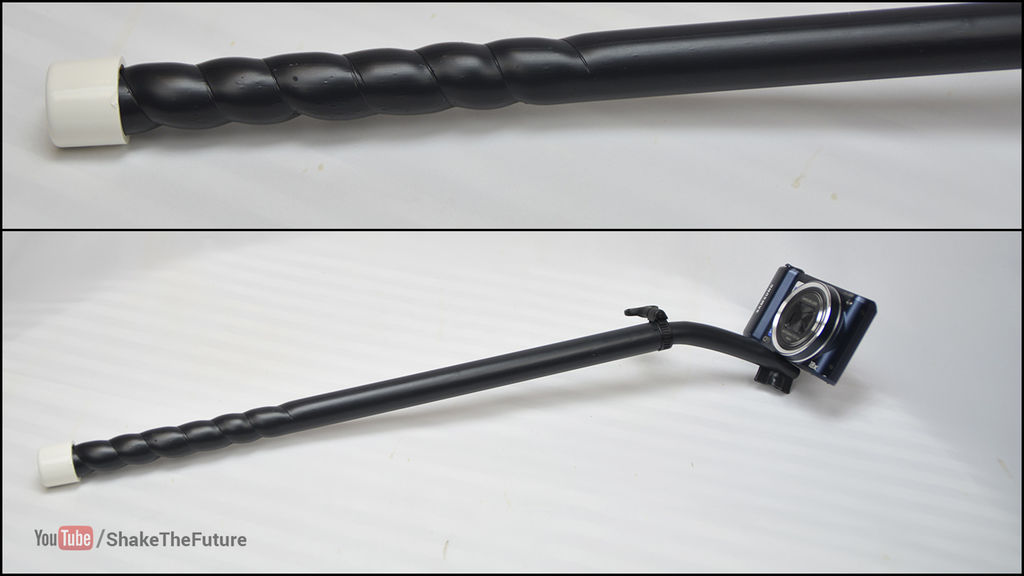
And the final touch - we glue a white plug onto the free end of the large tube of the selfie stick.
That's all, good luck with your creations. brain craft!
V currently many people have PVC pipes in their household. EU
DIY pvc pipe products
13:31 02 August 2016As a preface
At the moment, many people have PVC pipes in their household. If they have already bothered you, then in no case do not try to throw them away and change them to others. They have a whole host of advantages.
First of all, one cannot fail to note the pleasant White color. It is perfect for creating interesting products. In addition, the most common glue can be used to fasten the elements. If you don’t glue everything, then it’s even better. You will receive a kind of LEGO constructor. consider interesting ideas that you might like. You yourself can think what you will do, it is enough just to show your enthusiasm.
Just look at the high chair pictured below. Surely you want to build it. The temptation is very great.
From one pipe, you can easily make a folding chair. It's perfect for a picnic.

Do you want everything to look organic? Then just create a set of several chairs and a table from the same pipes.

A great bunk bed for kids. But you need to choose pipes of optimal diameter so that the load is distributed.