The question is how to close the pipes in the toilet, is of interest to property owners at the stage of renovation planning. People want any room in their apartment to be not only functional, but also beautiful. Modern technologies for cladding various surfaces provide a wide range of ways in which you can beautifully and practically hide vertical and horizontal lines designed to drain the drain. There are many options for how to close the pipes in the toilet using various materials and technologies.
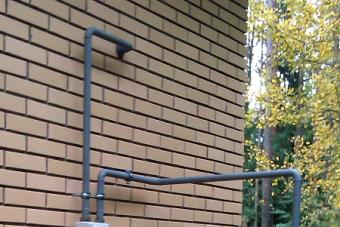
50 mm pipes run along the back wall of the bathroom, through which drains from the bathroom or kitchen are discharged. Even modern aesthetic plastic products will not decorate a room that shines with a new finish. You can hide them in various ways, depending on the structural features and layout of the building.
You can use the following options for masking horizontal communications:
- Remove them in a niche passing in the stove. If there is no such niche, then you can make it yourself with the help of a grinder and a perforator. First you need to specify the thickness of the floor slab. If it is too thin, then the longitudinal niche can weaken its bearing capacity. After laying the sewer, the strobe is filled with starting or finishing putty.
- Cover communications with tiles. Depending on the design, the finish that covers the floor or the one planned for the walls is used. In order to facilitate the subsequent replacement of pipes, it is not recommended to fill them with cement mortar completely.
It is necessary to close the drains in such a way that they can be quickly reached in case of an emergency or for repairs.
Ways to close the sewer riser
thinking over how to close the sewer riser in the toilet, a number of nuances must be taken into account.
Please note that this is a public building. On each floor, the risers are equipped with inspection hatches to eliminate blockages. At any time, these hatches must be accessible to representatives of public utilities.
There is a water supply near the riser. It is equipped with stopcocks and meters that must be open to take readings. You can't close them tightly.
If the sewerage is to be replaced in the near future, then it makes no sense to build a capital structure to mask the risers. You can use a light temporary structure or a removable fixture that does not need to be destroyed during repairs.
It is worth considering the options for closing the riser, which have been tested by time and have earned positive feedback from the masters and their clients.
Sheathing the riser with drywall
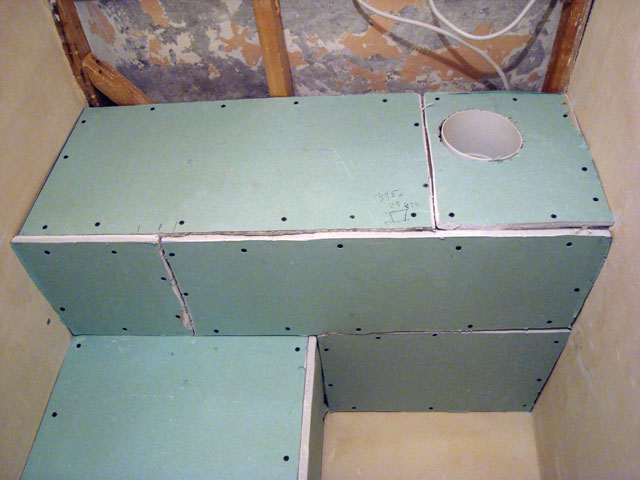
The simplest, but not the fastest way to mask a toilet riser is to make a drywall box. This material is widely used today in all areas of construction and repair.
Close up the pipes in the toilet with drywall maybe even a novice master, using the minimum set of household tools that are in every apartment.
For work you will need:
- perforator;
- metal scissors;
- roulette;
- screwdriver;
- level;
- hammer;
- thin knife;
- sickle mesh;
- putty;
- primer.
It is necessary to equip a drywall box only when the floor and walls are finished. For the construction of the frame, it is better to use a metal profile, since a wooden beam can deform over time.
Sheathing of the sewer riser is carried out in the following sequence:
- Drawing markings on the floor and walls. Drilling holes for fastening the guide profile.
- Frame assembly. The sequence of this event, regardless of the configuration of the box, is the same - installing vertical racks and connecting them with jumpers from carrier profiles.
- Sheathing the frame with plasterboard. Blanks are made by cutting along the marking line. After that, the desired fragment is broken off. Screwing blanks is carried out with a screwdriver and self-tapping screws. The edges of the drywall strips should be attached to the profiles at intervals of 10-15 cm.
- Putty box of plasterboard. When the solution dries, it is treated with a deep penetration primer. If the box is being prepared for painting, then its surfaces are polished.
- Arrangement of doors or inspection hatches. The door is made in the place where the revision hole is located. Instead, you can equip a plug using a ventilation grill for this. It is better to close the counter and ball valve with a light door made of plastic.
The manufactured box can be tiled with ceramic tiles, painted and wallpapered. The disadvantage of this choice is that if it is necessary to replace the pipes, the structure will have to be broken without the possibility of recovery.
Closing the sewer riser with plastic
Close the pipes in the toilet with plastic panels You can use the frame or connect the strips directly to the walls and to each other. The advantage of choosing this material is the ease of its processing and installation, the possibility of quick dismantling in the event of a production need. Another advantage of using plastic panels is the complete absence of wet work and debris during the installation process. A certain disadvantage is the difficulty in choosing the right color and shade of plastic so that it matches the wall decoration of the toilet.
Consider the options for manufacturing frame and frameless boxes:
The frame version is used in cases where the internal volume of the toilet is sufficient for the construction of spatial structures. In order to make a frame for PVC panels, you can use a steel profile or profile. Since plastic is a flexible material, it is not affected by changes in the shape of the tree from moisture or drying. Therefore, you can choose the material for the frame based on your preferences and experience.
To make a plastic box you will need:
- perforator;
- level;
- roulette;
- screwdriver;
- stationery knife;
- marker;
- wooden beam or steel profile;
- plastic profiles (starting, external and internal corner).
Do not use staples to attach panels to the frame. In a humid environment, the metal is destroyed in 2-3 years. It is better to use self-tapping screws equipped with drill bits at the ends.
The work is carried out in the following sequence:
- A drawing of the box is being drawn up. Calculation of building materials is carried out.
- Marking is applied to the walls, floor and ceiling. Holes are drilled into which plastic dowels are inserted.
- The side racks of the frame are attached to the walls. If the riser is in the corner, then the central rack is attached. Its fixation on the ceiling and floor plate is carried out using metal corners.
- A starting plastic profile is attached to the frame with self-tapping screws. Depending on the project, a decorative plinth can be used.
- The plastic panels are adjusted in length and width. It is best to cut them with a sharp clerical knife. It should be cut 3-4 mm more than the distance obtained, based on the wall thickness of the profile.
- Panels are installed in the cavity of plastic profiles. When assembling the corner structure, the edges of the panels are screwed to the central support and sealed with a polymer or MDF corner. You can make a non-rigid mount in the outer corner.
The finished box is beautiful and looks neat. It can be easily and quickly disassembled for maintenance or repair.
The frameless method of masking the riser is used when working in very tight spaces, in which the sewer is located in one of the corners. As a rule, it is not possible to attach supports for the frame due to the toilet tank. In this case, the starting profiles are screwed directly to the tile. The panels are inserted into the contour formed by them and fixed at the junction with brackets or long self-tapping screws. The junction is sealed with a corner made of plastic or MDF. The design has sufficient strength and reliability.
Closing the riser with blinds and roller shutters
The use of roller blinds, horizontal and roller blinds, allows you to solve the problem of masking the sewer riser and water supply quickly, beautifully and efficiently.
The advantages of such a solution are obvious:
- high speed of work;
- significant space savings;
- the possibility of obtaining full or partial access to communications;
- beauty and lightness of design;
- relatively low installation cost.

A certain disadvantage of blinds is that they darken over time and have insufficient strength (especially steel ones). This problem can be solved by installing plastic structures that are durable, resistant to fading and corrosion.
It should be remembered that roller shutters and blinds do not provide complete insulation. They cannot be used as a partition between the toilet and the common shaft through which plumbing communications pass.
In order for the blinds to look presentable, you need to make a box through which pipes will pass. It is advisable to install taps and counters there. Free space can be used to install shelves on which you can store household chemicals, tools and fishing accessories. Roller shutters will look much more presentable, as their design provides for a rigid fixation, not only from above, but also on the sides. Accordingly, the service life of such a device will be much longer than conventional window blinds.